
Now, I’m going to talk about how I build tone.
Pressure
The first way you build tone is through pressure. Simply put, the harder you press down on the pencil, the darker the mark you’ll make. The lighter you push down on the pencil, the lighter the mark you’ll make.
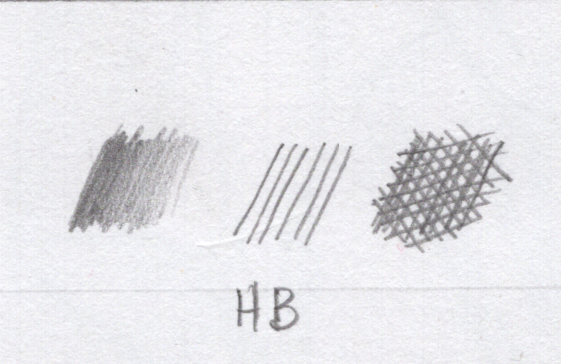
Here, I have an example of pressure with a little bit of layering using an HB pencil
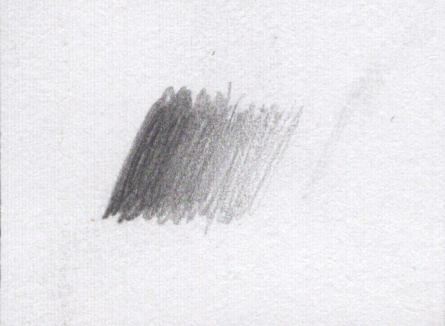
On the left, I have a dark mark because I pressed down with a heavier pressure than I did on the right where I pressed down gently (and used less layering).
There’s more to making a dark or light mark than pressure, but pressure is one of the key parts to it. The harder your press, the darker your hatch marks will be, the more gently you press down, the lighter the hatch marks will be.
That being said, I don’t like pressing down too hard. I use at most a medium‑light pressure and layering to get a dark value when I need it. If that isn’t enough, I like to switch to a softer, darker lead (more on that later).
Layering
First way is pretty straightforward. The more layers you place down, the darker the resulting value will be.
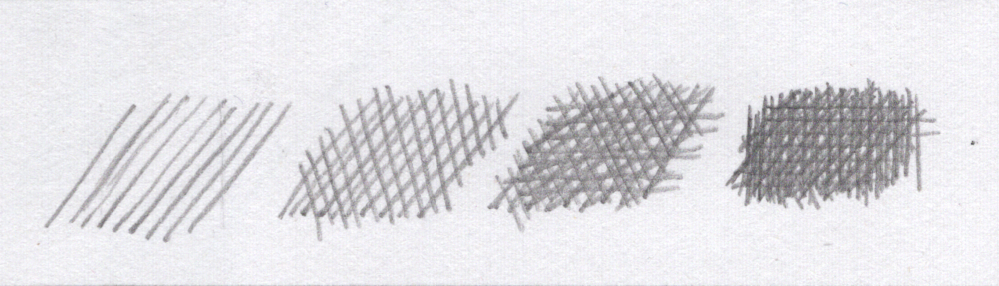
Every time you lay down a set of hatches, you of course make sure they cross the previous layer of hatching at an angle. If you want your hatching to stand out, as opposed to continuous shading, don’t overdo this. Make sure you can see the different layers of hatching you’ve laid down distinctly.
Hatch Spacing
The tighter your hatching, the darker the resulting tone will be. I would suggest experimenting with making your hatches have wide spaces between them and then tightening them up.

Lead Grade
The grade of lead you chose is next. Depending on the letter and number, the lead will give you a lighter or darker mark for the same level of pressure you apply to the pencil onto the paper.
H grades, “H” standing for “hard”, are hard leads that will give you a light mark. They have a higher ratio of clay to graphite in them. The higher number, the lighter the mark.
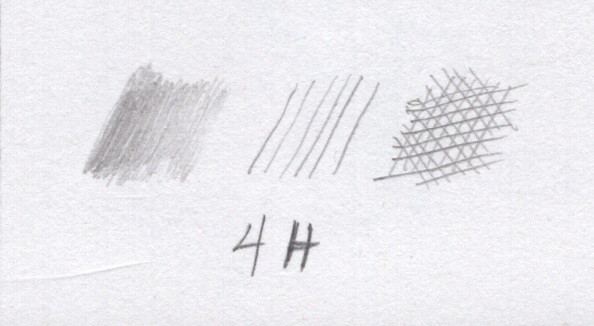

I recommend using the H grades for when you need to create halftone. Halftone is the shade you see in the light. As the surface of an object begins turning away from the light, it will get darker. However, it will not ever get as dark as any part of the object that’s completely facing away from the light – that would be the shadowed side of the object.
It’s important that you keep halftone light. You need to put it in to create a three‑dimensional effect, but you also need to make sure you don’t destroy your value balance. Otherwise, you won’t be able to tell your shadows from your lights.
So, the H grades are perfect for that.
B grades, “B” standing for “black”, are softer leads that will give you a darker mark. They have a higher ratio of graphite to clay in them. In this case, the higher the number, the darker the mark you will make.
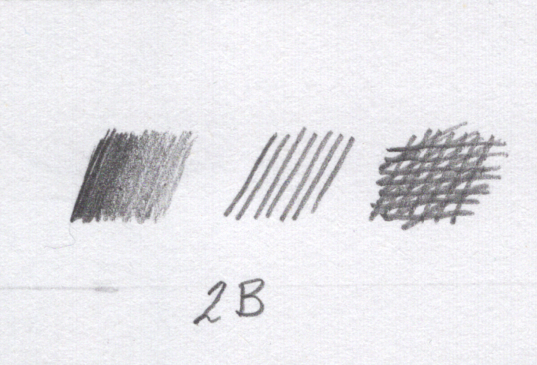

When building the shadows or any otherwise dark tone, you’ll maybe want to use a B grade lead. Otherwise you won’t reach the level of darkness you might need.
There’s a grade called HB which is, as you’d expect, something between hard and soft grades. This is what’s used for writing, and in drawing, can give a decent range of values. Won’t be as dark as the highest numbered B grade, but you won’t be constrained to light values as in the H grades. Might be good for laying in a drawing and getting in your middle values.
Putting It All Together
So, when you shade and you decide to use crosshatching, you need to decide between at least three things: the number of layers you need, the spacing of your hatching, and the lead grade you want to use.
Here’s a sphere:
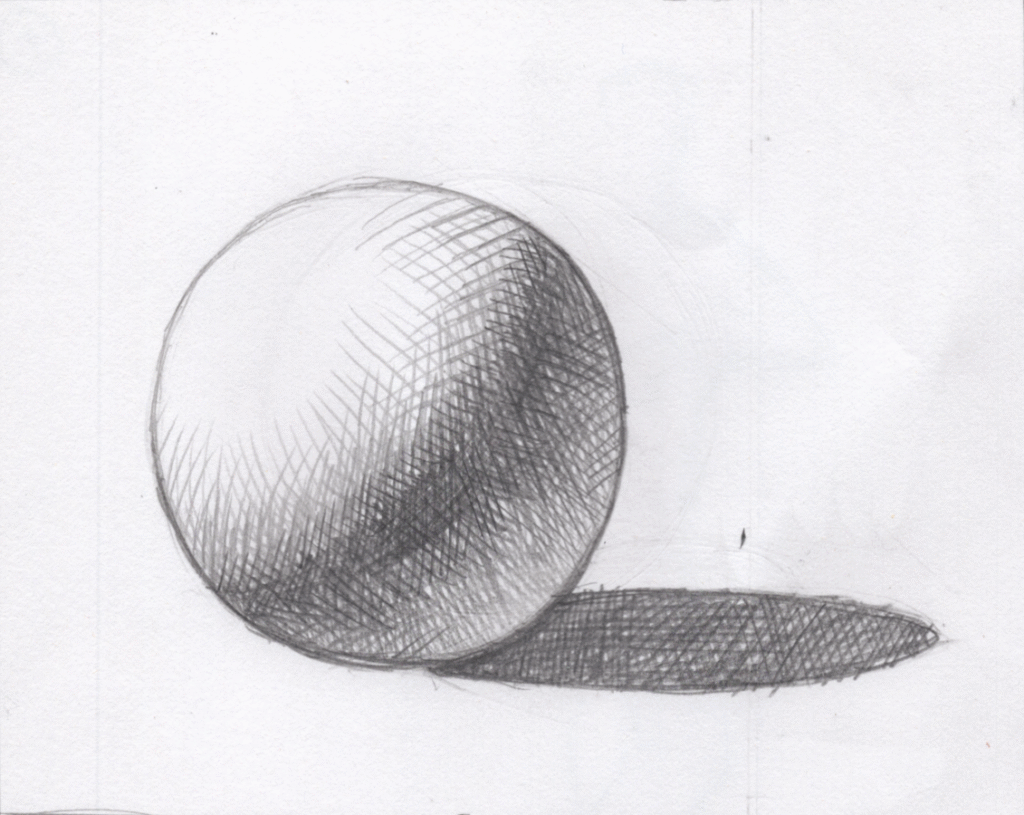
I used 2B in the shadow.
I used 2H grades in the lighted area for the halftone.
I used a few layers for the shadow, and a few for the halftone. To really punch up the darks of the shadow, I used a few more layers of hatching than I would have for the halftone.
And for the halftone, I kept my hatch spacing a little wider than I did for the hatch spacing of the shadow.
In the area of transition, you can see that it’s a mix of crosshatching with both grades.
Using Your Judgement
Now, there’s not a hard and fast rule for every situation, however, when you’re making decisions on how to crosshatch and build value, these three things are a good place to start. The rest is exploration and experimentation.
I would recommend practicing in a sketchbook. You can do this in a practice drawing or even outside of one – just practice crosshatching in your free time without the pressure of making a finished drawing. Maybe writing down what grade of lead you chose, noting your hatch spacing, how many layers you decided to use.
This will take time, but again, practice till you get it down.