
Rendering Part 3
Photo Reference
Where We Left Off

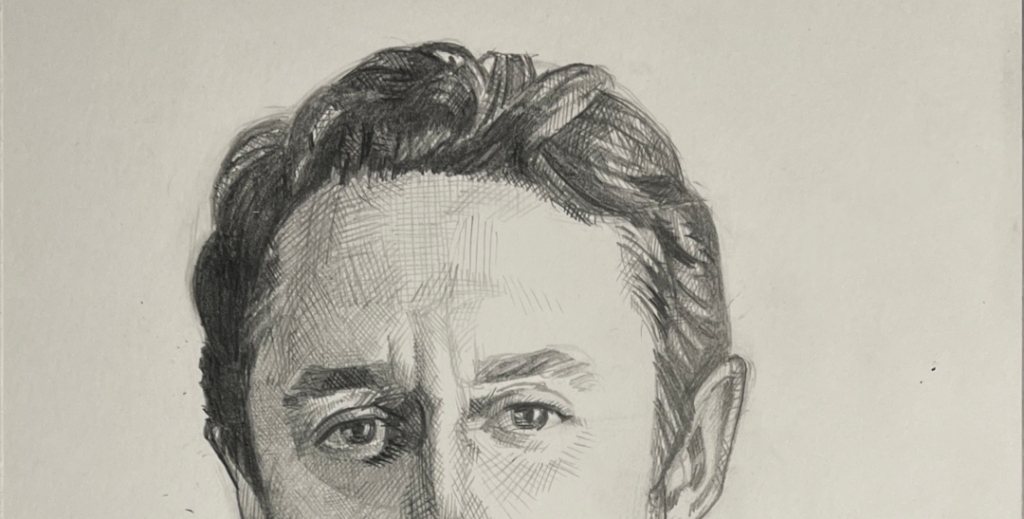
I more or less have rendered the face.
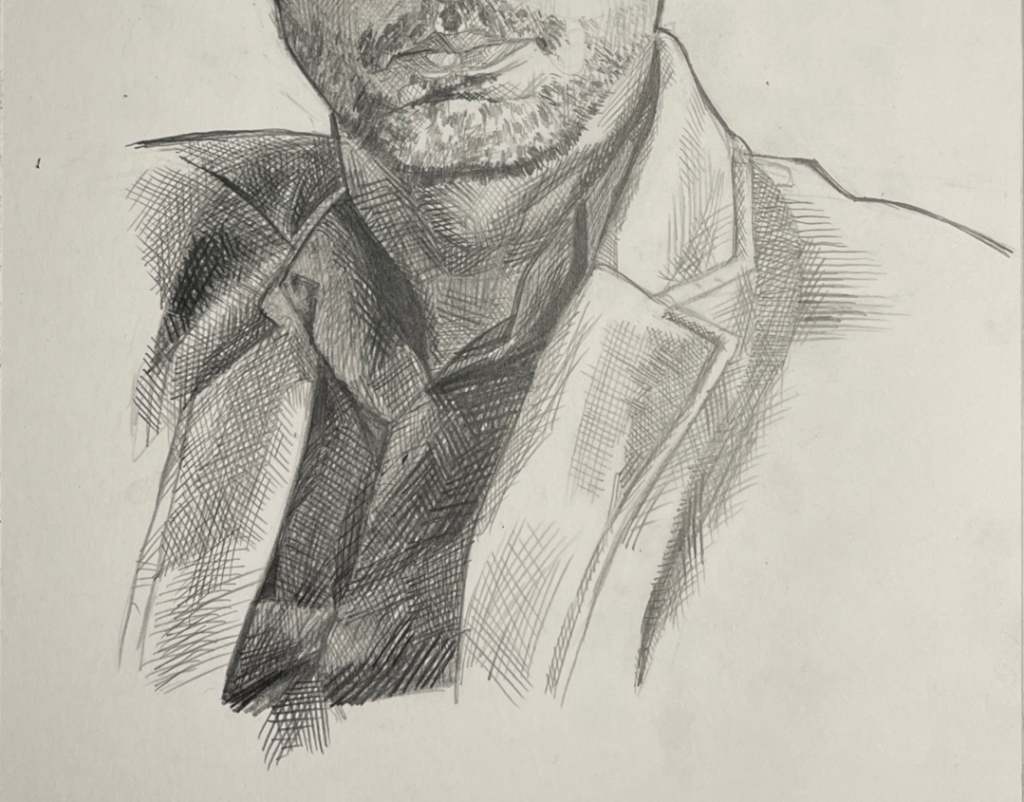
The Clothes
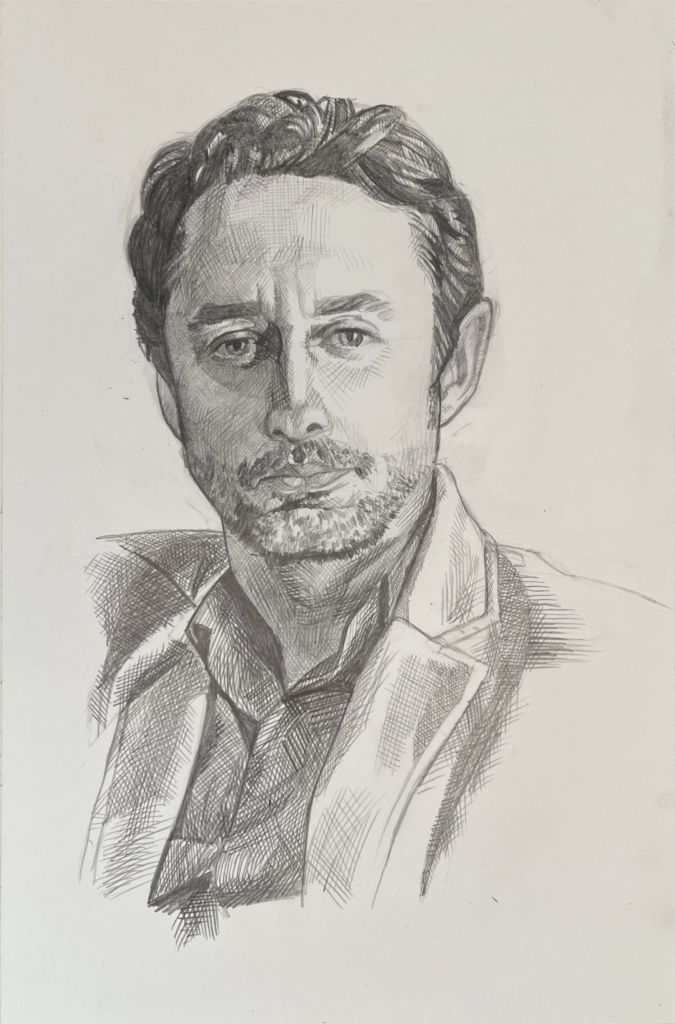
I’m a little bit looser in my rendering with the clothes. The viewer’s focus will be on the face, so perhaps the clothes don’t need as much attention.
I lay in the clothes with hatching that contours its folds and planes.
Finishing Out
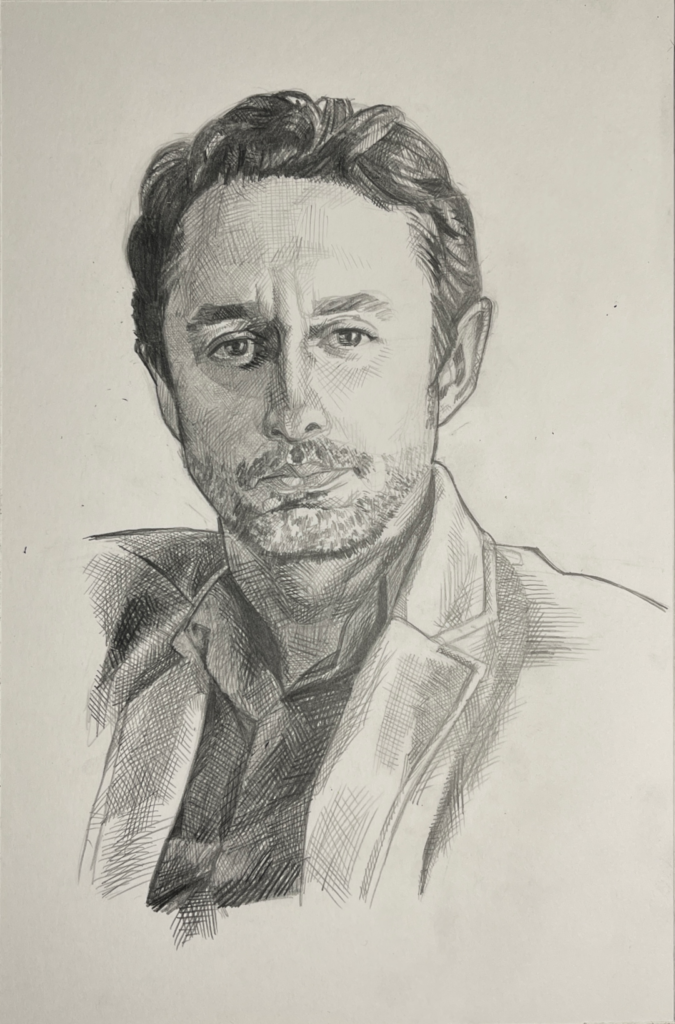
It’s time to bring this drawing to a close.
First, I bring the values on the shirt down. My first pass was okay, but I really need to distinguish the local value from the skin tone and jacket. I darken those values by going over everything with a 2H pencil. This time, it’s a continuous stroke. Because it’s a 2H pencil, it doesn’t darken the values by too much. And that’s the beauty of using a hard pencil over softer grades: greater control over how much you darken a value by.
I find that the darkest shadows aren’t dark enough, so I bring out the 2B. This is the first time I bring out the 2B for this drawing. I didn’t think I’d need until now, but I do. I use it for the darkest shadows, areas of occlusion to really give them punch. The darkest areas of the drawing need to set off the areas of light to sell the three‑dimensional effect.
I darken the shadows of the face. The shadow at the right side of the forehead needed ever so slightly an adjustment.
I darken the right side of the hair that’s catching the least amount of light.
I darken the highlights of the hair. I find that I don’t need them to be the brightest, given the local value of the hair.
I add more 2B to shadows that need it like the corner of the right eye.
I model out the nose a little bit better, adding more values, blending things together more smoothly.
Finishing Touches
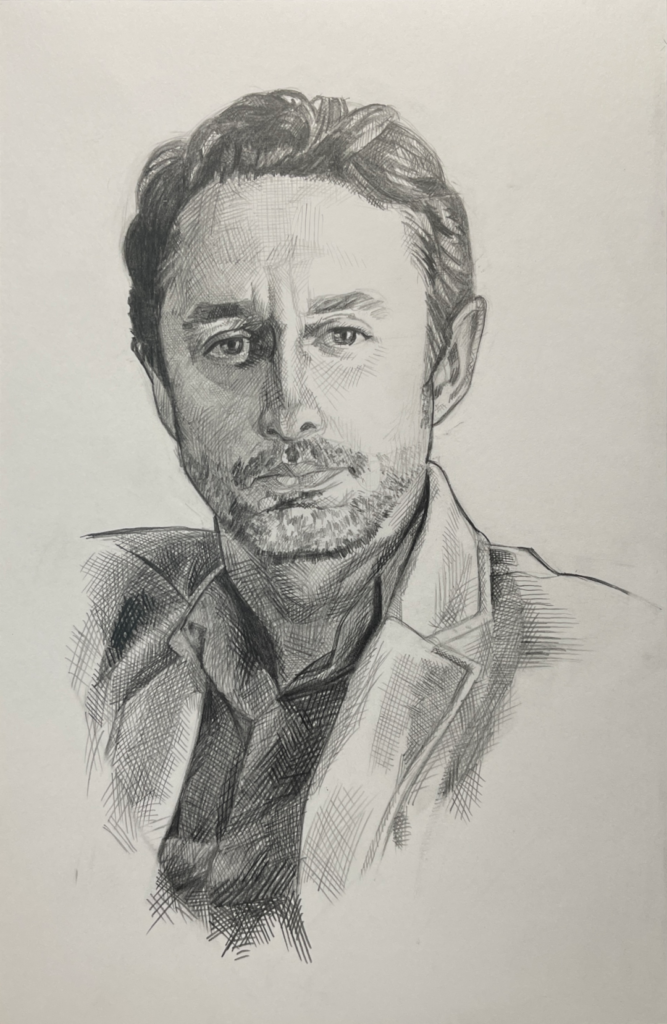
Perhaps I should have thought this out in the beginning, but I erase parts of the bottom of the portrait to create a V shape. This makes it look more like a bust and is a stylistic choice you sometimes see in portraiture.
And with this, I bring this drawing to its finish.