Line Drawing
Photo Reference

Here, we have a man in business attire.
The light is coming in from the subject’s left. Lots of ambient and bounced light to keep the face illuminated, however.
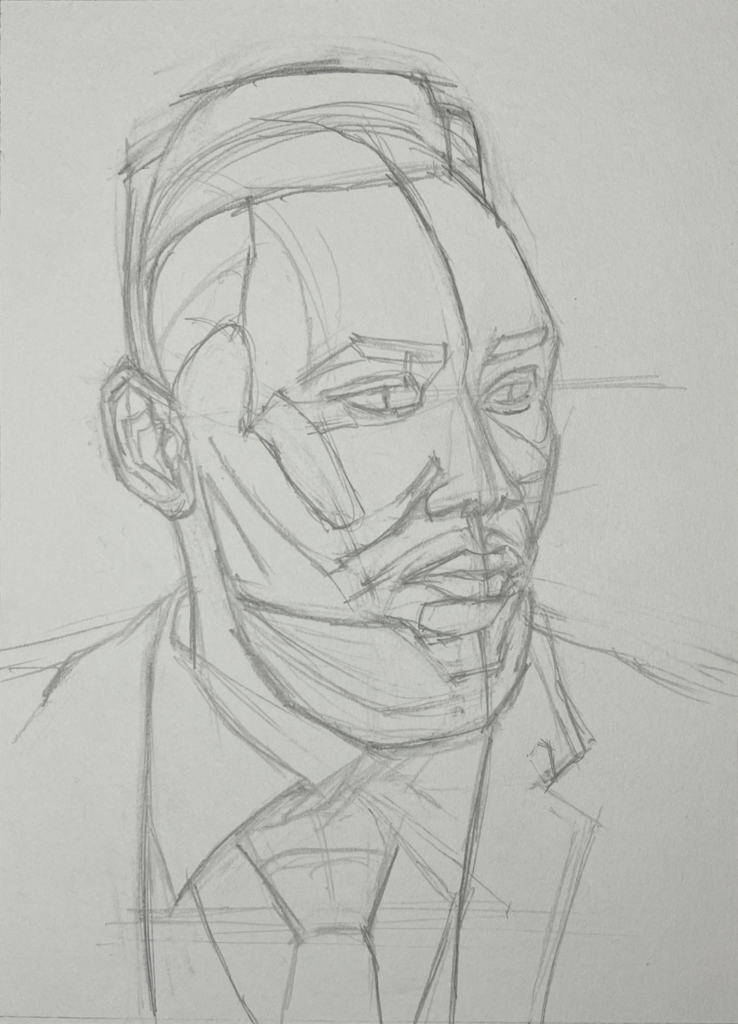
Abstraction
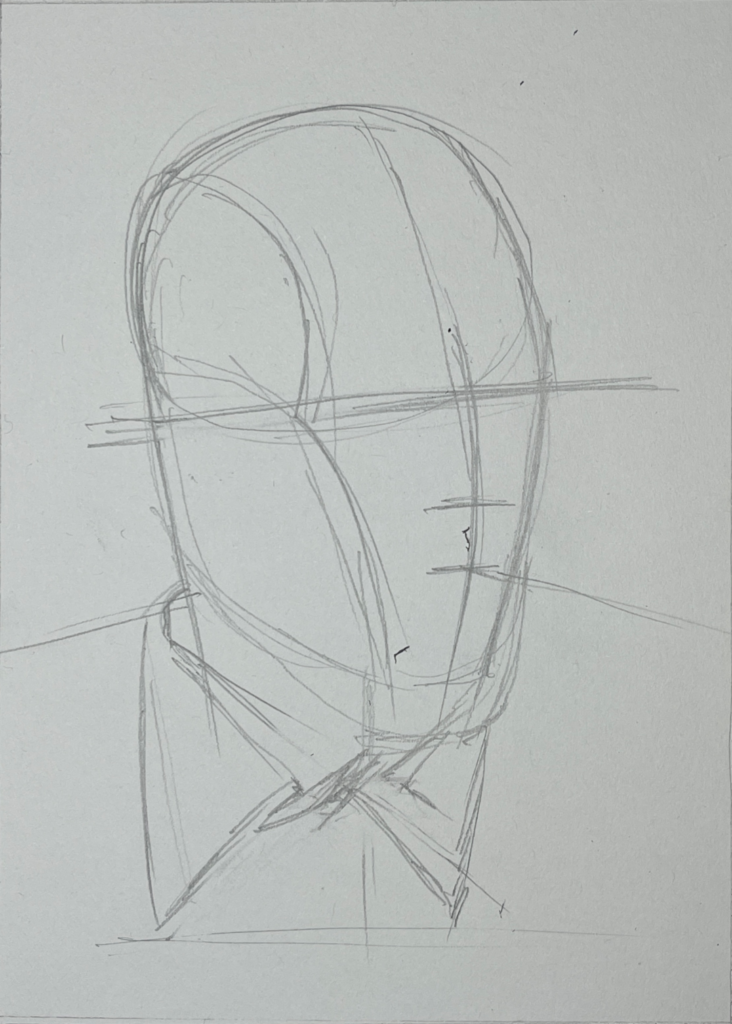
I abstract the head.
I need to get in the angle that the head is tilted at and the angle that the head is turned. I try to get in some of the broadest planes of the face at this stage of the drawing – the cheek, the temple.
I indicate the shoulders and put in the shirt collar.
I indicate in the eyes, the nose, the mouth, the ear. I indicate the tops of the eye sockets. I draw the contour of the cheek, the brow.
I also get in the hair both on the top of the head and the beard. At this point, I do not need to add details to the hair, just indicate its general border.
I’ve drawn in the tie and lapels.
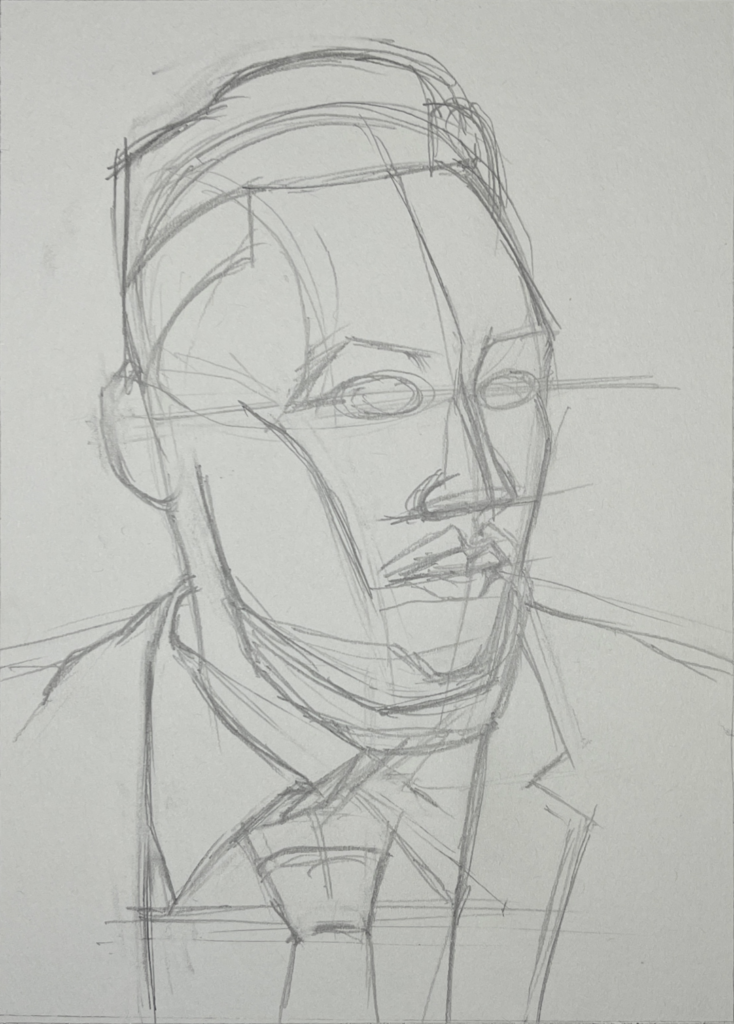
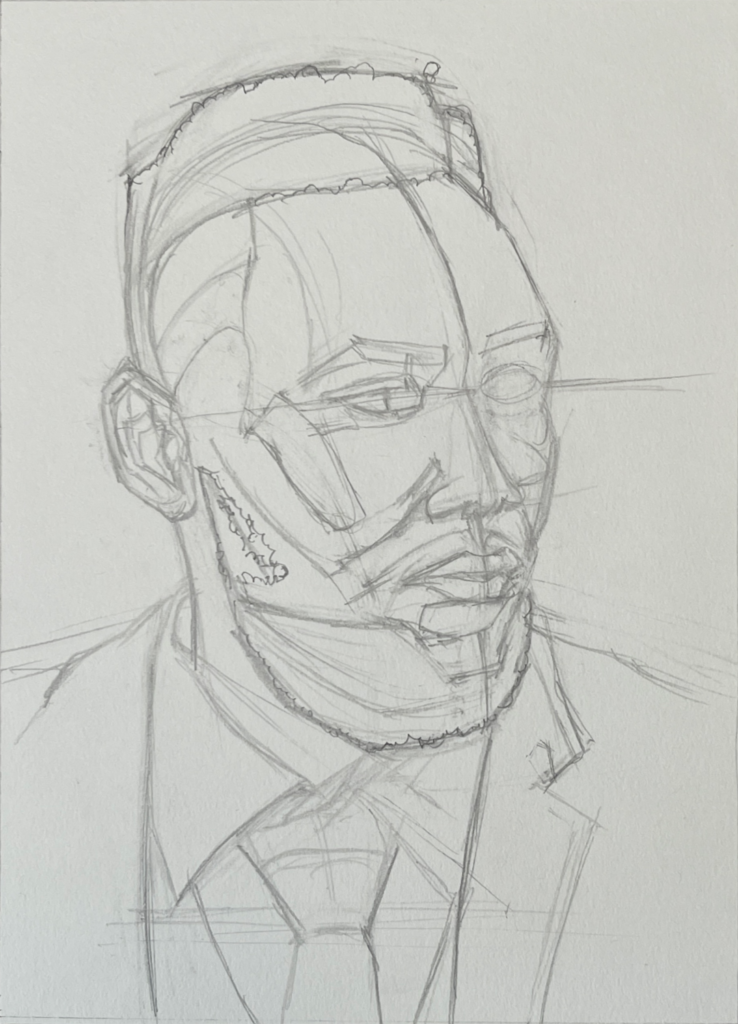
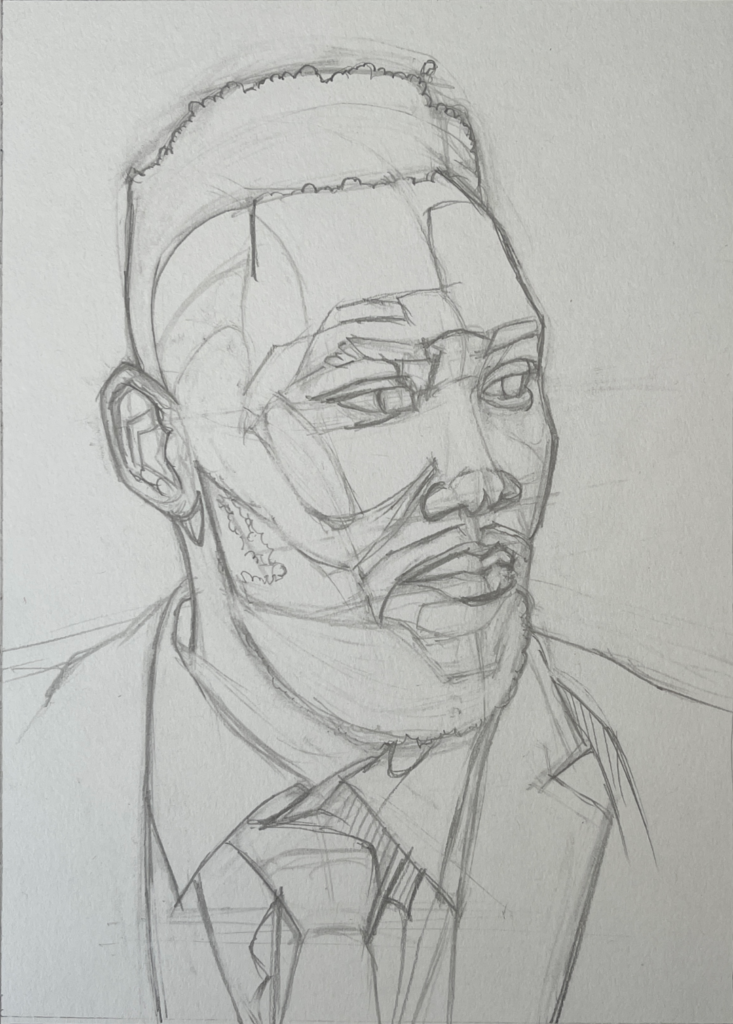
Beginning Development
I’m still keeping things loose, but now I begin to draw the smaller features. I put in the eyes, the eyebrows. I add detail to the noses a little bit. I develop the shape of the lips.
I’ve developed the right side of the model’s face more now.
I’m holding up my pencil, using plumb and level to check alignments, angles, curves. I do it both on the photo reference and the drawing. This helps greatly within the initial stages of the drawing for placement and accuracy.
You can see I’m also beginning to develop the planes of the face. I put them in now to help me make sure the features are placed right, that proportions aren’t off. I do sometimes find that when I begin the rendering stage of the drawing that I haven’t left enough room for the details inside the line drawing. Drawing out those interior planes and value shapes will help with making sure I won’t have to redraw too many things later in the shading phase.
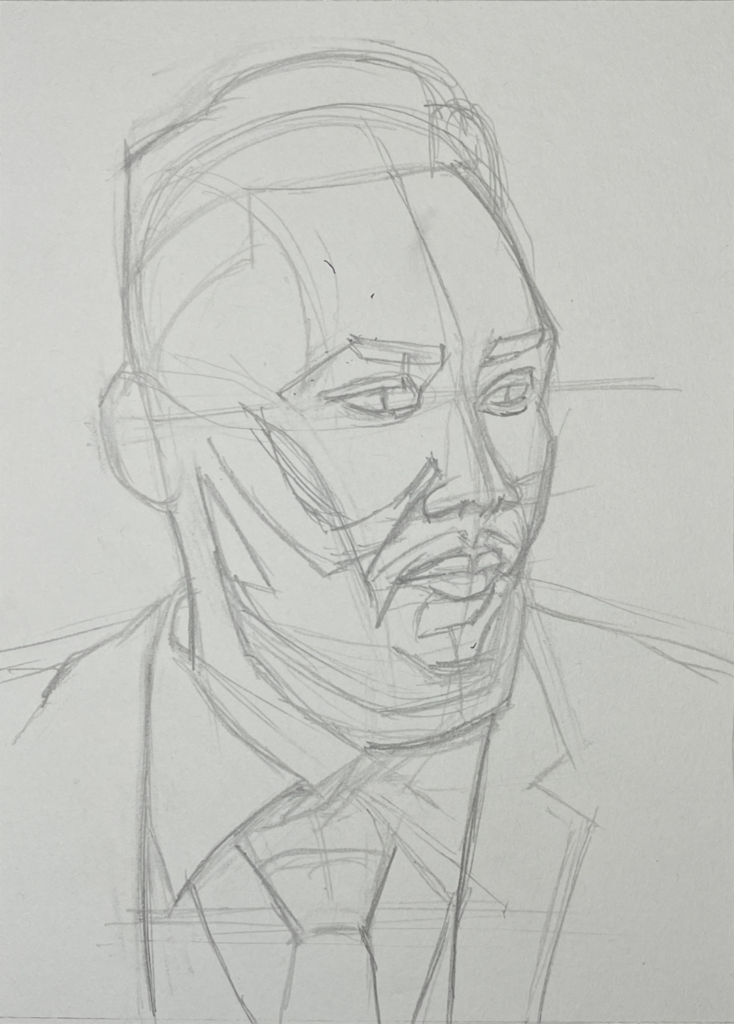
Developing the Drawing, Correcting Mistakes
I needed to correct the placement of the mouth just slightly.
I had made the central guideline of the face curve in a little too much in the very beginning. I did not correct that for a while, and I even made the mouth conform to it. That means that the mouth was receding into the face a little too much. I’ve pushed it forward here, reflecting what it looks like on the model.
I draw in more planes of the face.
I put in the structure of the ear as well.
I’ve begun to detail the outline of the hair.
However, in the process, I’ve noticed a few more mistakes I’ve made in structuring. I have to erase the right eye and bring it up a little because it didn’t look right in perspective otherwise.
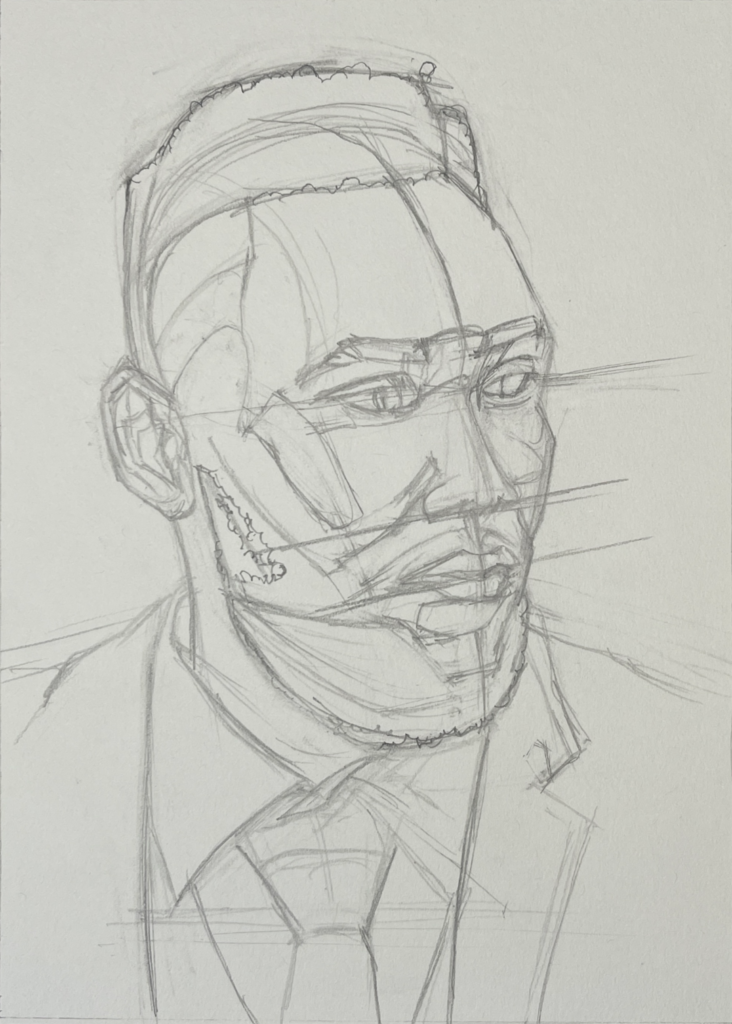
While I’m at it, I need to make sure everything on the face aligns properly as well. I’ve drawn back in the guidelines for the nose and mouth to make sure that they align with perspective properly.
Contouring
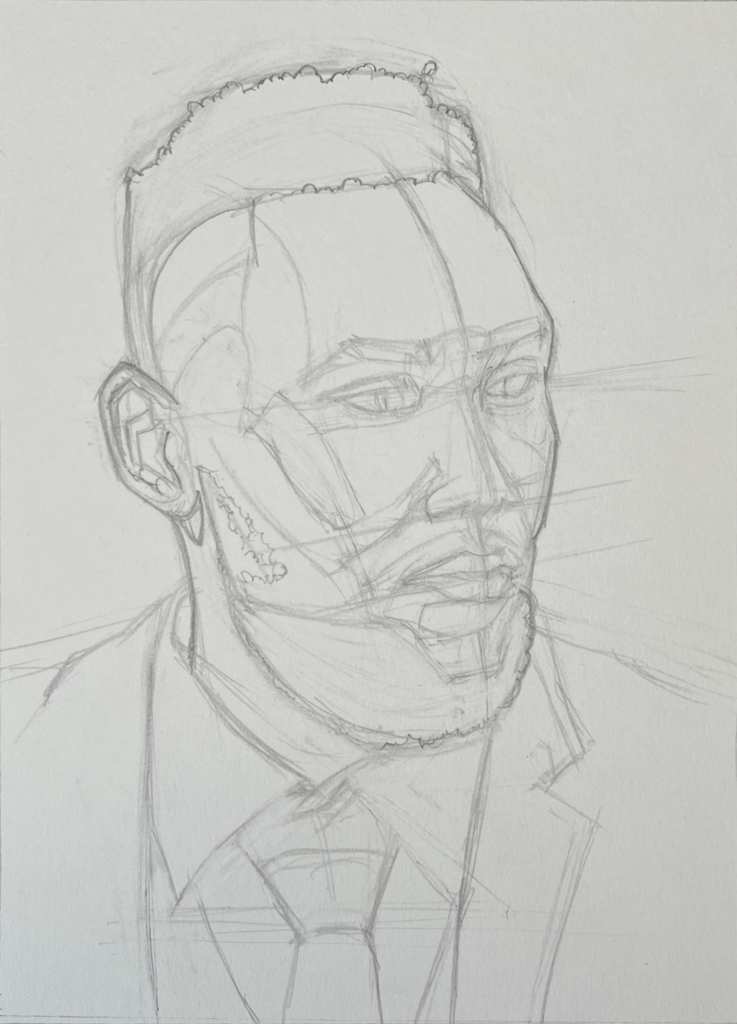
I’m going to begin the contouring now. That means cleaning up the linework.
First, I roll a kneaded eraser over the entire drawing to lighten it. I’m going to then go over the lines with more confident stokes. After that, I will erase the sketchy lines around my redrawn contours.
I bring the lay-in stage of the drawing to a close.
I’ve gone over the important contours with confident, darker strokes, and I’ve cleaned up the area around them as much as I need to for the next stage.
I’ve left the indications of the planes and value shapes in. They should disappear under the shading. And if they don’t, I can easily erase them out at the end.
Other Posts in This Series
- Demonstration: Portrait In Graphite no. 2 (2) Rendering Part 1
- Demonstration: Portrait in Graphite no. 2 (3) Rendering Part 2
- Demonstration: Portrait In Graphite no. 2 (4) Rendering Part 3
- Demonstration: Portrait in Graphite no. 2 (5) Rendering Part 4
- Demonstration: Portrait in Graphite no. 2 (6) Rendering Part 5
- Demonstration: Portrait in Graphite no. 2 (7) Rendering Part 6
- Demonstration: Portrait in Graphite no. 2 (8) Finishing the Drawing