
Rendering Part 3
Photo Reference

Where We Left Off
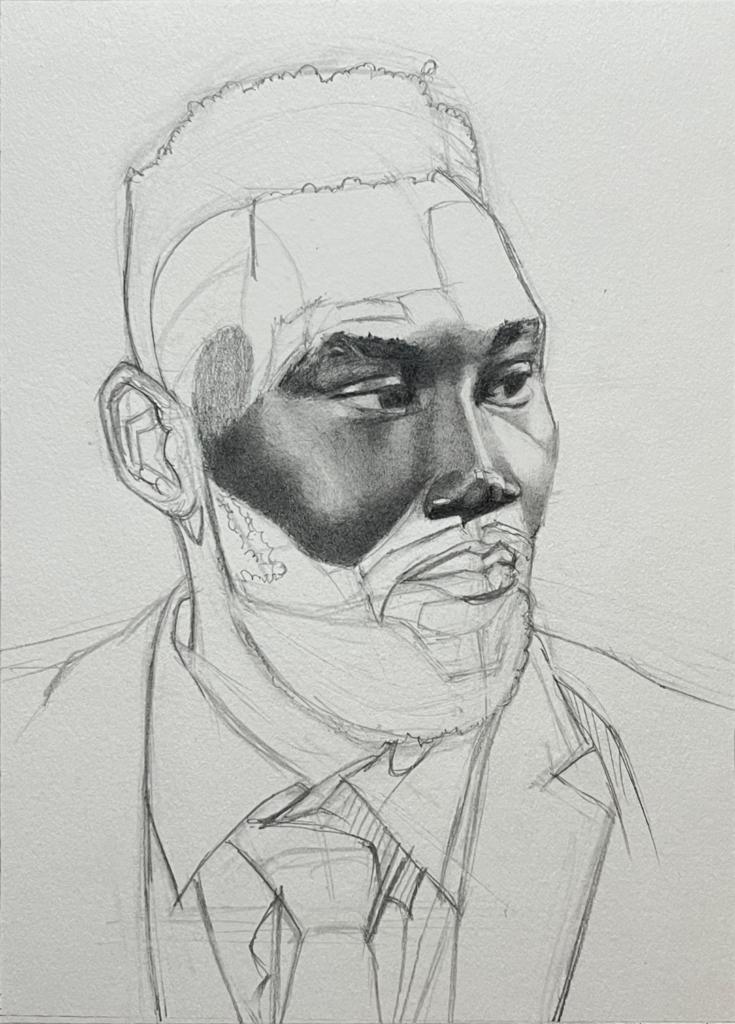
In the previous post, I had moved across the middle area of the face – the cheeks and the nose.
Continuing Down the Face
I move down the mouth in my rendering. I block things in the same way I’ve done it in the previous posts, then blend things together. Still using H grade leads to block things in, using a sharp tip to fill in paper tooth valleys. When I need to, I lift graphite with the kneaded eraser, and I can use it to cut shapes into the graphite where need.
I’m finding I’m building momentum. I’ll admit that I haven’t done continuous shading for a while at the time of this post, but I’m getting the feel for it back bit by bit.
I approach the mustache by laying in a kind of pattern of shapes. I don’t want to draw each individual hair, but I need to create an organic pattern to convince the viewer that what you’re looking at is a mustache. Like with anything else, I block it in with a flat value, and later, I will model things out.
When it comes to the lips, I don’t want to get too detailed, but to suggest the details you might see in lips, I draw out a pattern suggesting them and block in value flatly.
I move down and cover the bit of skin left that’s not covered by the model’s beard.
Pushing the Darks
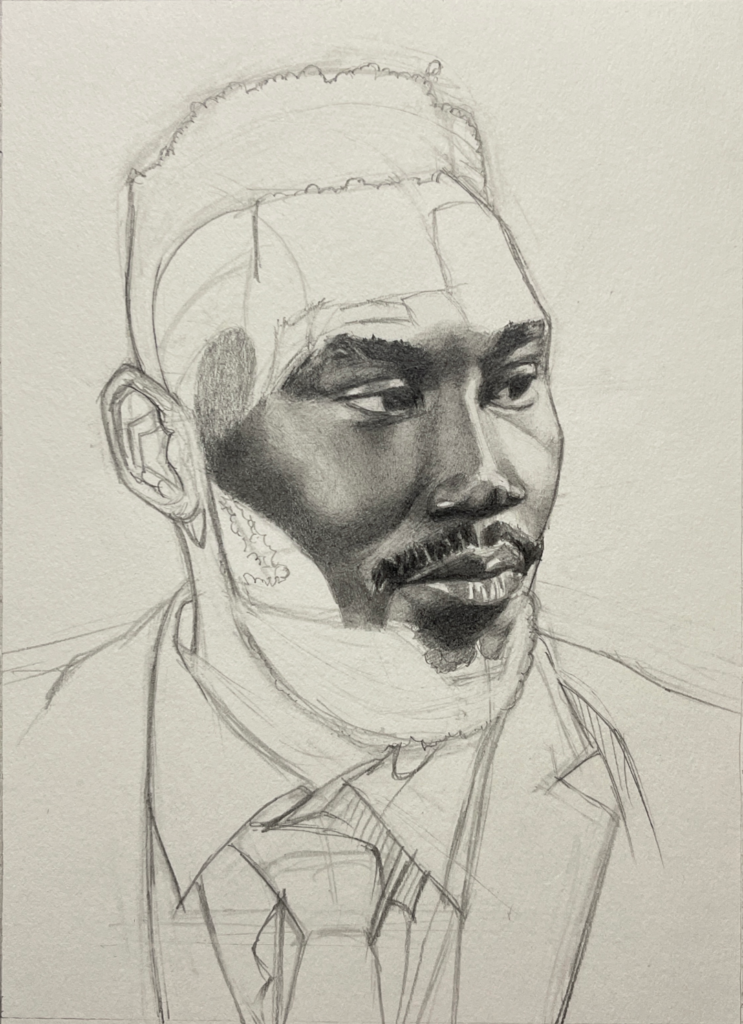
It’s time to bring out the B grades again. For the darkest darks, I bring out the 4B lead. That would be the area under the chin, the crease of the lips.
I even find I need to go back over some areas from previous days and darken them with the 4B like the shadow under the nose, the shadows of the eyes, the eyes themselves, since the irises are so dark.
I use the 2B for certain accents in some areas that are dark but not very dark like the shadowed areas.
When it comes to the mustache, I dab some lights out with the kneaded eraser and blend out the edges because hair needs to have soft edges.
Closing Thoughts
That’ll be enough for today.
I’ve covered the main triangle of the face – the eyes, nose and mouth. While I’m far from finished, I can see things shaping out, and I look forward to seeing this drawing’s completion.
Other Posts in This Series
- Demonstration: Portrait in Graphite no. 2 (1) Line Drawing
- Demonstration: Portrait in Graphite no. 2 (2) Rendering Part 1
- Demonstration: Portrait in Graphite no. 2 (3) Rendering Part 2
- Demonstration: Portrait in Graphite no. 2 (5) Rendering Part 4
- Demonstration: Portrait in Graphite no. 2 (6) Rendering Part 5
- Demonstration: Portrait in Graphite no. 2 (7) Rendering Part 6
- Demonstration: Portrait in Graphite no. 2 (8) Finishing the Drawing