The Line Drawing
Reference Photo
Here we have a photograph with a male sitter for this portrait. Full view portrait, lighting is coming in from the sitter’s left side, shadows are not too deep.
The Abstraction Stage
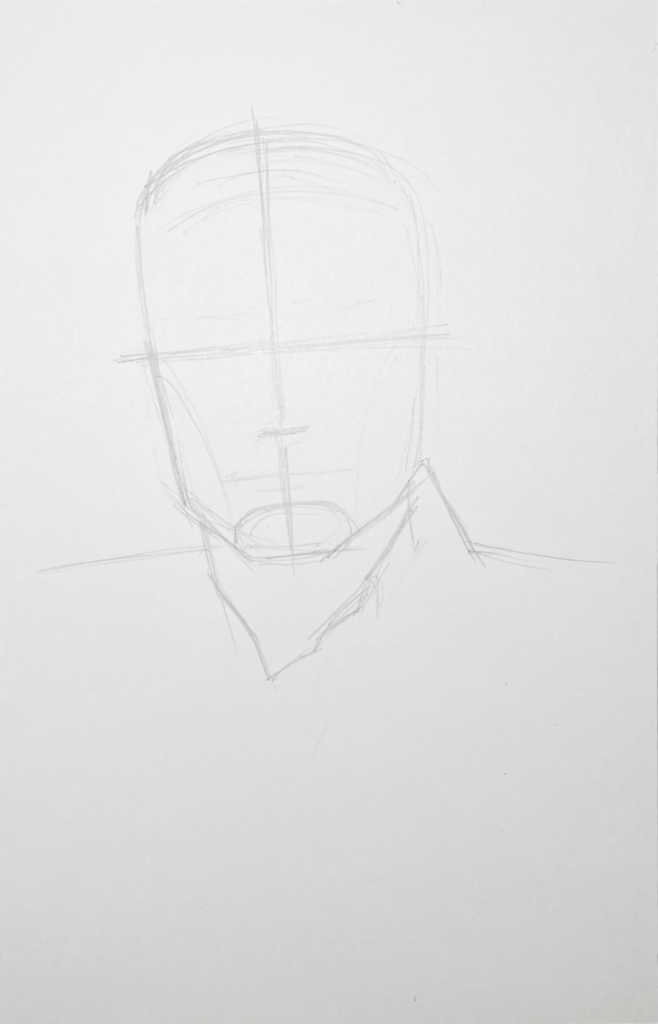
I start with abstraction.
Here, I try to care more about the general shape and proportions of head. No details, very generalized, sketchy, searching lines.
The human head is generally oval- or egg-shaped, so I could start with that, and I do, partially.
However, I still like to capture the shape of the jaw even in this stage; again, still no details, but the shapes I use are more angular. The lines I use for the jaw are straighter, the corners of shapes sharper.
I should note that even in the abstraction stage of the drawing, I try to note the uniqueness of the sitter’s head proportions; I don’t want to create a shape that I would have to make a lot of corrections to later.
If the head would be narrow, I’d make the abstracted shape narrow. If it would be wide, blocky, long, etc., I’d draw the base oval shape of the head to match those proportions.
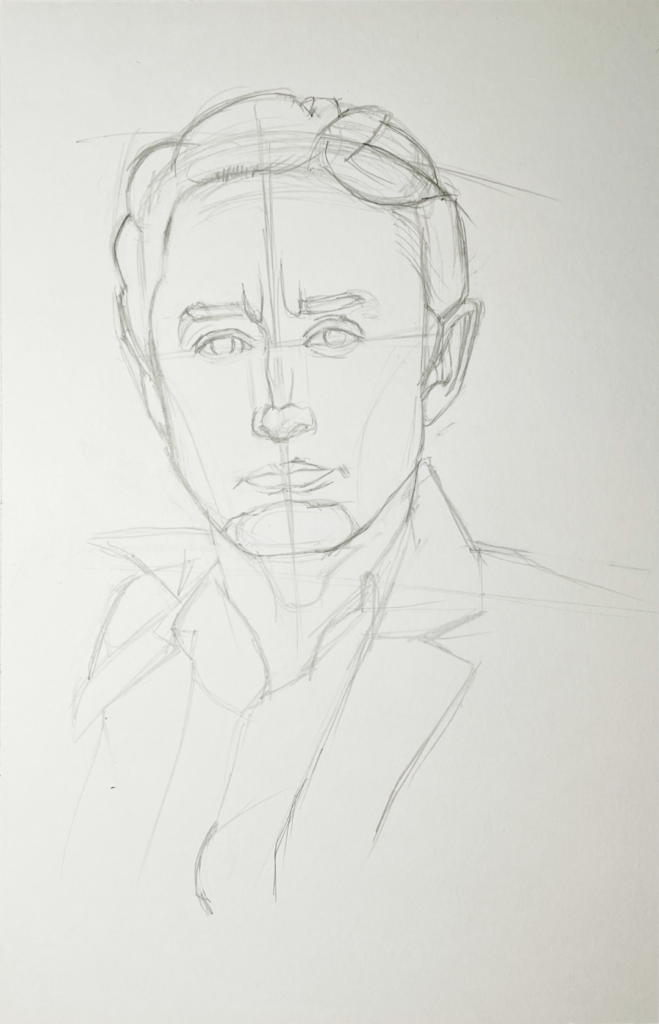
Placing the Features
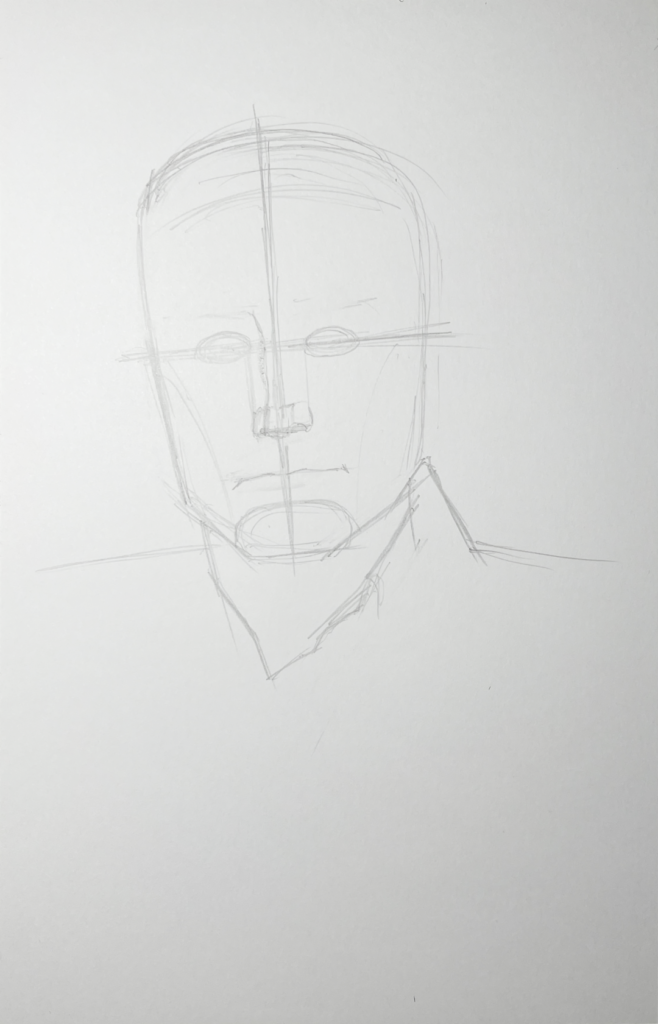
I’m still keeping things generalized, abstracted. I place the features – eyes, nose, mouth.
At this stage, I’m checking whether everything is spaced well. Is something too close? Too far? Now’s the time to make sure of that and redraw appropriately.
I’m also still checking that proportions are right. Maybe putting in the features will make me realize something I couldn’t in the previous stage of the drawing, which was even more generalized.
Just to note, I eyeball things. I judge whether somethings feels right or wrong intuitively and then make the changes accordingly when needed.
Continuing to Develop the Abstract Stage
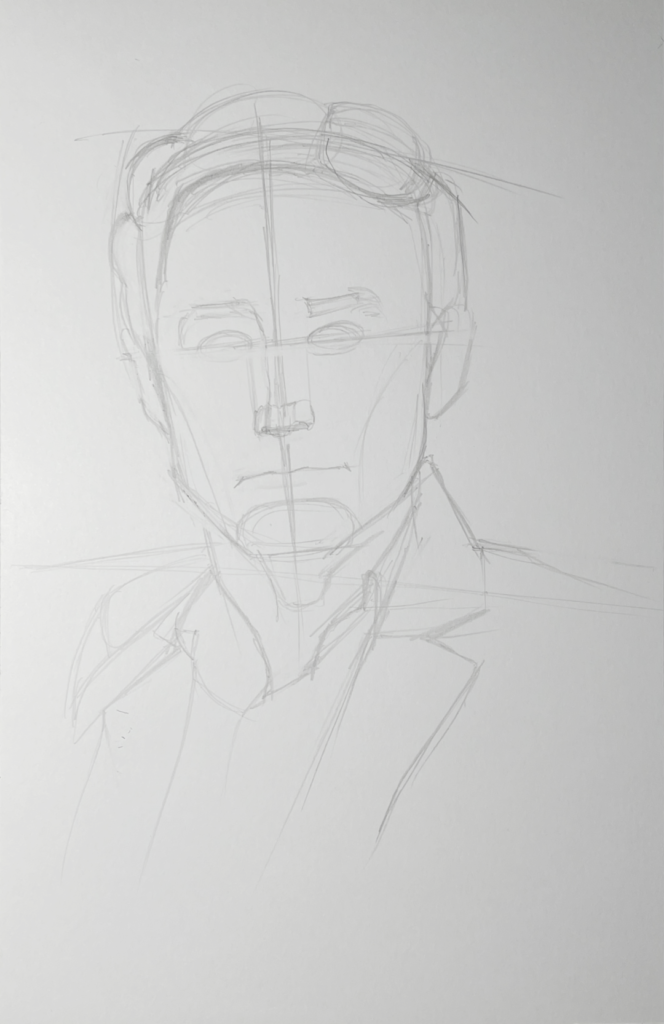
I’ve put in the ears, the eyebrows, the hair, the clothing. I’ve made note of the sitter’s Adam’s apple.
I’m not ready for details yet, not really. But at this point, I need more points of reference to make future judgements. I continue to develop the drawing, still keeping things relatively abstract. I’m moving down the scale of size, establishing more intermediately‑sized shapes and forms. Note that I’m still using simple contours, keeping things generalized.
Here is where you really take note of relationships. By relationships, I mean the alignment of things.
Is one shoulder higher than another, therefore the shoulders are tilted? Are they actually aligned. A good way to make sure of this is to measure the tilt or the angle by holding up the pencil horizontally first against the reference, then against your drawing.
This is called plumb and level. Plumb meaning vertical, and level meaning horizontal.
If you’re using photo reference, you can literally put the pencil against the photo and your paper.
If you’re drawing from life, you use forced perspective – obviously, don’t be touching the live model or objects everyone in the class might be drawing from.
With forced perspective, you hold your arm out straight, keeping your elbow locked, hold the pencil straight up and down or straight horizontally, close one eye, and try to bring your pencil right up to the edge of the subject, visually speaking, to be able to judge angles, curves, and tilts against your pencil held either at plumb or level.
When something looks wonky on my drawing, then among other things, I check the alignment of various things this way.
As I stated, it could be the shoulders, it could be the eyes, the eyebrows, where the notch of one lapel aligns the other.
It doesn’t only have to be of features of symmetrical things like the eyes. Does the corner of the collar align with the side of the face vertically? Do the corners of the eyes align with the corners of the nose? Where do the corners of the mouth align with the eyes? Or the corners of the mouth with the corners of the jaw?
Contouring
Now, it’s time to bring the drawing to its finish. I’m going to contour.
Put simply, contouring is when I draw in the lines of the line drawing as accurately as possible. I’m finally trying to achieve the sitter’s likeness. Then, I’m going to refine the linework, make it as clean as possible.
To really make the contours look like they should, I pick a place on the reference, find an edge, and run my eyes along that edge. What I’m trying to do here is memorize how that edge looks and translate it into line on my drawing. Might only need to do this once, or I might have to do it multiple times to really get it into my mind.
The line I draw should look like the edge I’m looking at in the reference of course. I should be able to run my eye along the drawn line, and my eye should take the same direction, the same path, make the same shape as the edge within the reference.
I do this for the eyes, the nose, the jaw, the hair, the clothes, etc.
I take as much time as I need for each area. This is the time to tighten up, get as many relevant details in. No more looseness as you saw in the abstraction stage.
If there are differences between the reference and the drawing, I erase and correct. I try to redraw it as it looks in the reference. If I have to do this a few times, so be it.
As I’m contouring, I’m again looking at relationships, proportions. If something looks wrong, I have to redraw it, making it wider, narrower, taller, shorter, or make whatever correction I need.
I can’t get too attached to the drawing; if I want it to look accurate, I have to do what it takes to make it so. Maybe I’d have to erase a whole section and redraw it from the abstraction stage.
Last Things
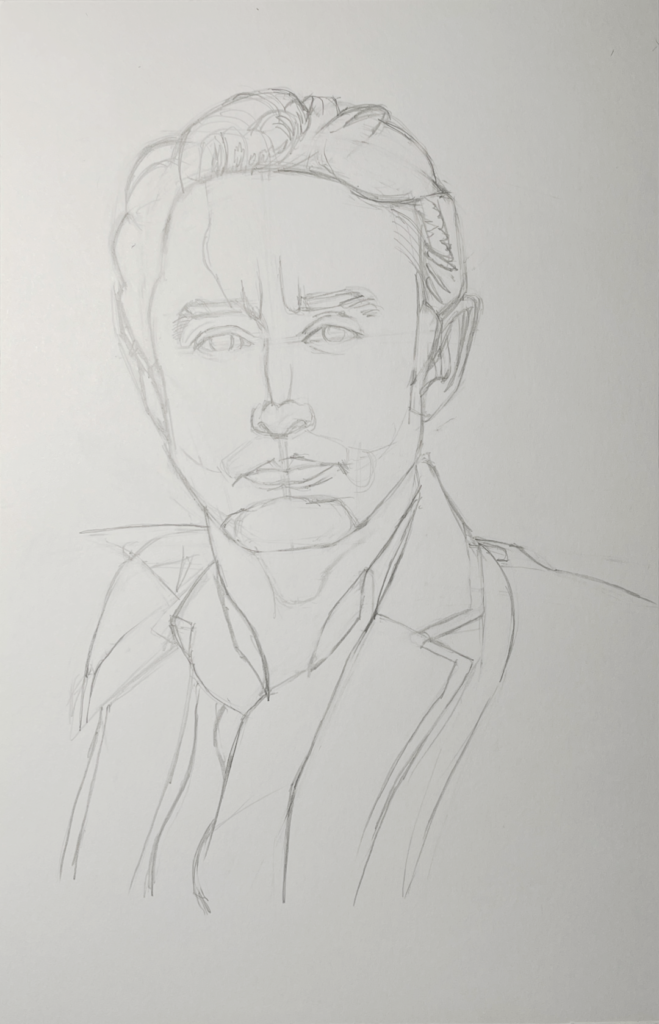
I’m still cleaning up my linework at this point, but at the same time, I’m going to begin drawing the value map. By this, I mean I’m going to border out the areas of shadow from the areas of light.
This will give me a guide for the next part, rendering.
I also make a light outline for the beard. The sitter’s beard isn’t thick, so you won’t want a hard visible outline for the beard, but I do need to make sure that when I render the beard, it isn’t going to go beyond its bounds. I’ll erase any border still remaining at the end if it hasn’t been erased just through the normal process of rendering.
That’s it for the linework. Next post, I will be rendering.