
Rendering Part 1
Reference Photo
Let’s not forget our model for this portrait.
Where We Left Off
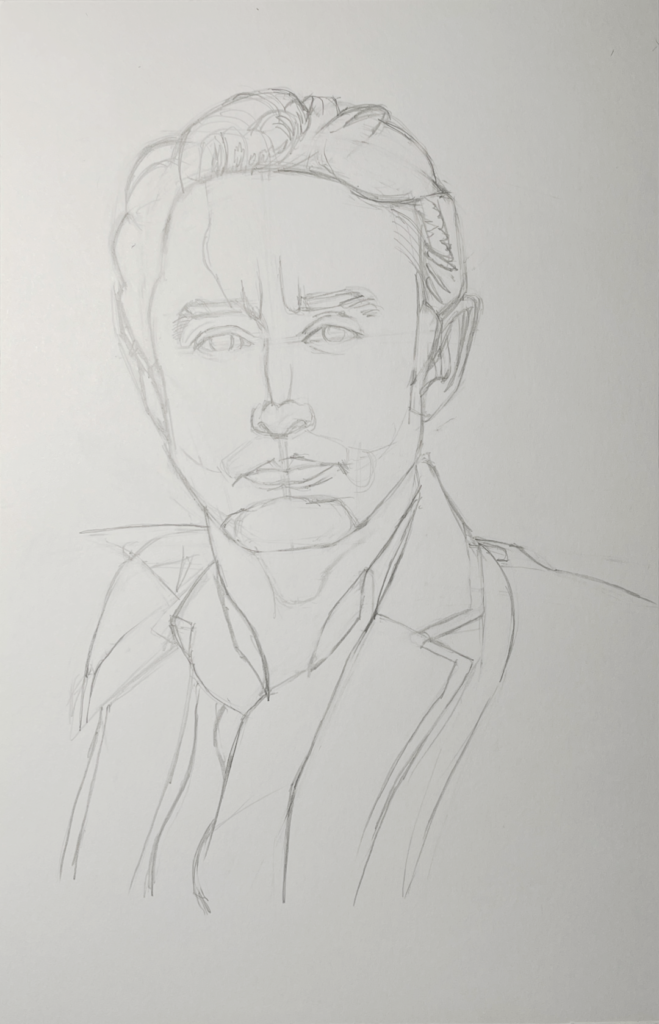
We pick up from last time where I was drawing the lay-in.
I will be tackling the rendering in sections. Rendering can take a while for me, and I’d like to post my process over time.
Crosshatching
My chosen method of shading will be crosshatching.
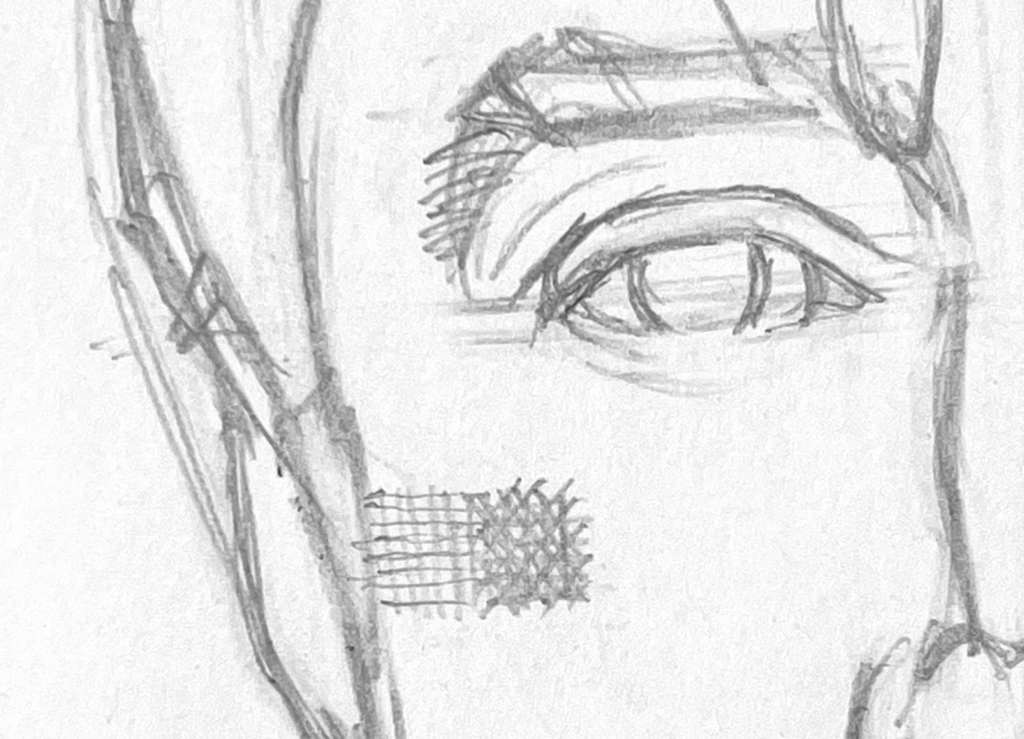
My process in crosshatching is to first draw a set of vertical hatches, next a set of horizontal hatches, then a set of diagonal hatches that go from left to right, right to left. With each set of hatches, the shading becomes darker, so I only hatch as much as I need to for any given area of value.
Right now, there’s no particular reason I do this other than I find it pleasing to me. Otherwise, my hatching could become disorganized, messy, and unpleasant to look at.
Blocking in the Right Side of the Face
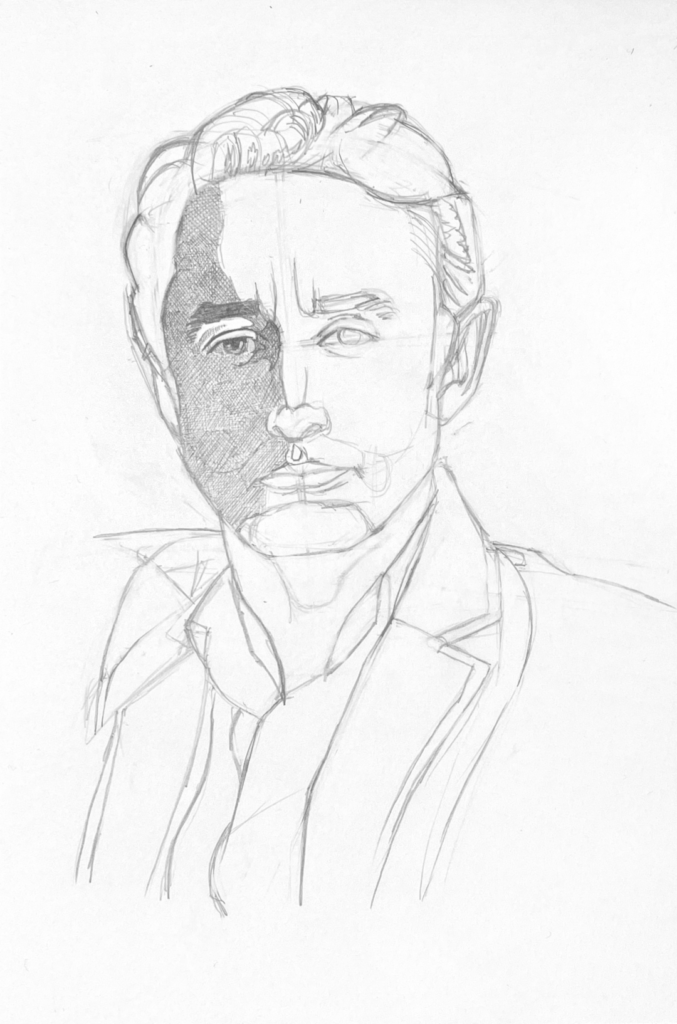
Here, I start with the right side of the model’s face. This is where the main shadow falls, after all.
First, I’m going to block everything uniformly in an even, flat layer of gray. I bring everything to about a number 3 or 4 on the value scale.
Maybe the one exception is the corner of the eye which has a much darker shadow. I darken that to maybe about a 5 on the value scale.
For this first pass, I’m using mostly a Staedtler 2H lead. For the corner of the eye, I used an HB lead.
Modeling the Right Side
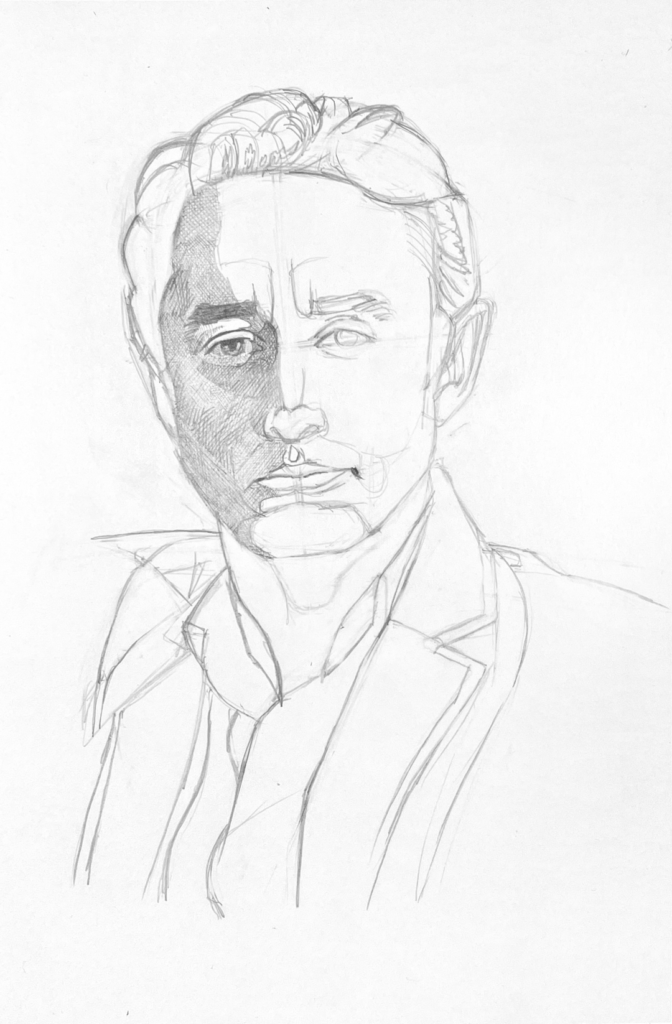
Next, I’m going to selectively darken some areas. To do so, I simply layer on more hatching, but I still keep it to an organized pattern as I prefer.
I do so under the eye, the temple, the right side of the nose, and the part of the cheek that faces away from the viewer. Values darken because of cast shadows or plane changes. You can compare my drawing to the reference to see where I saw plane changes and subtle value shifts.
When I darken my values here, I try to do so subtly, as in the reference, the changes aren’t so drastic.
Actually, on my first pass, I darkened the values too much. This resulted in me having to dab everything up with a kneaded eraser. If I went too far with lifting the graphite, I then gently went over the hatching to darken things back – but not to the same degree as I did before dabbing things up with a kneaded eraser.
I’d like to note that I make a slight change to my hatching as well. I conform the hatching to the interior contours of the face. Wherever the planes of the face change, turn away from the viewer, they also curve. I try to make the hatching curve to represent this.
At this point, I’m still working with my 2H lead.
Finishing This Session

For the close this session, I want to begin modeling the forehead. I’ve started describing the furrowing of the portrait sitter’s brow.
I’ve also put in some various darks at the corner of the mouth as well as the groove of the upper lip (called the philtrum). These I didn’t really hatch. I shaded them with a continuous stroke.