
Rendering Part 5
Photo Reference

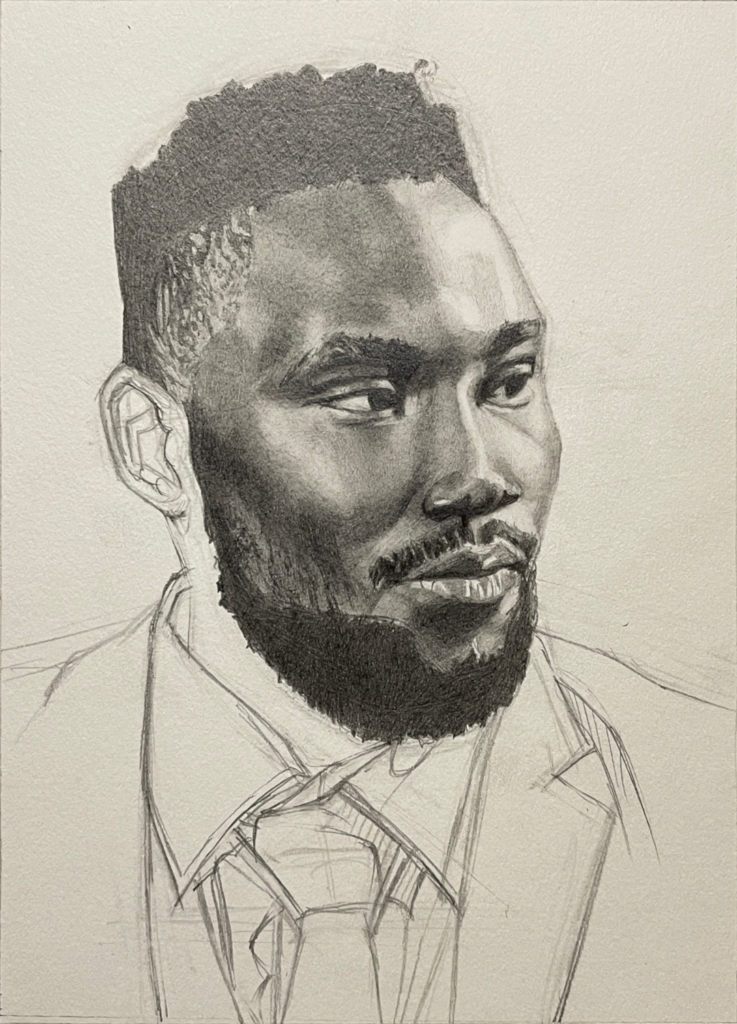
Where We Left off
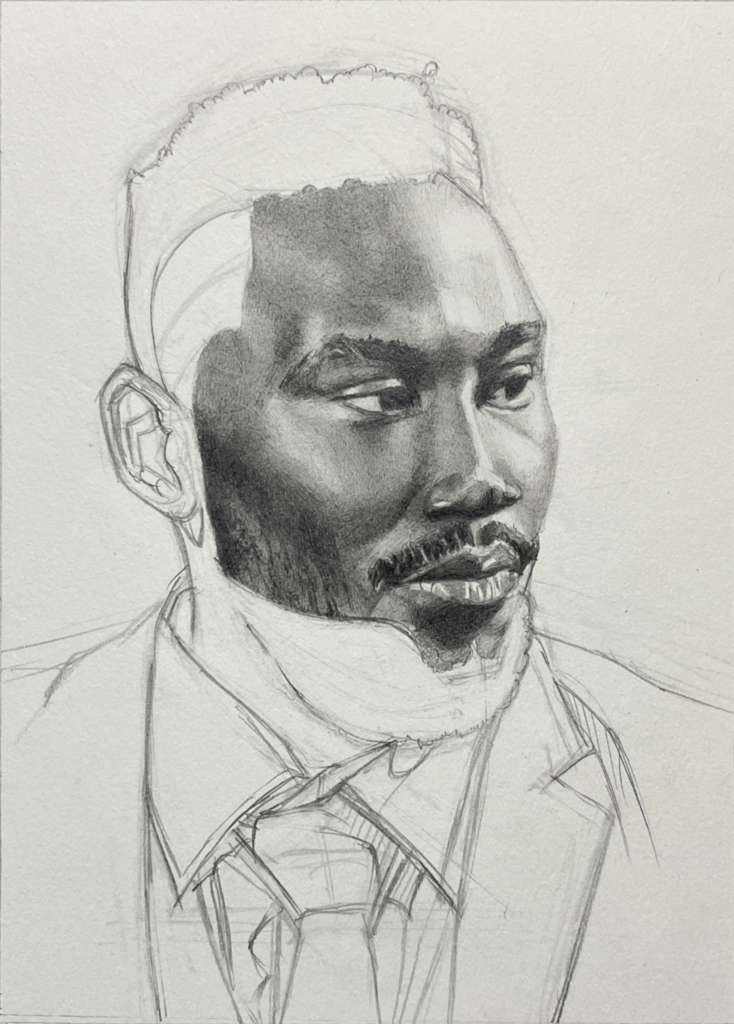
The face is more or less covered by this time.
The Hair
I’m going to begin the hair at the fade.
In order to create believable hair, I have to create a believable pattern of shapes. I won’t be drawing every individual detail of the hair, I’m going to create a pattern that resembles what I see in the reference and gives the impression of hair in the drawing.
Now, I do draw out my pattern before filling it in. I want to plan things out before shading, otherwise if I make a mistake or want to make a change, that’ll be more time. Nevertheless, I still make mistakes in the shading stage, but I want to minimize them if I can.
I did divide the fade into sections, and that’s for my own benefit – it keeps me organized in my approach.
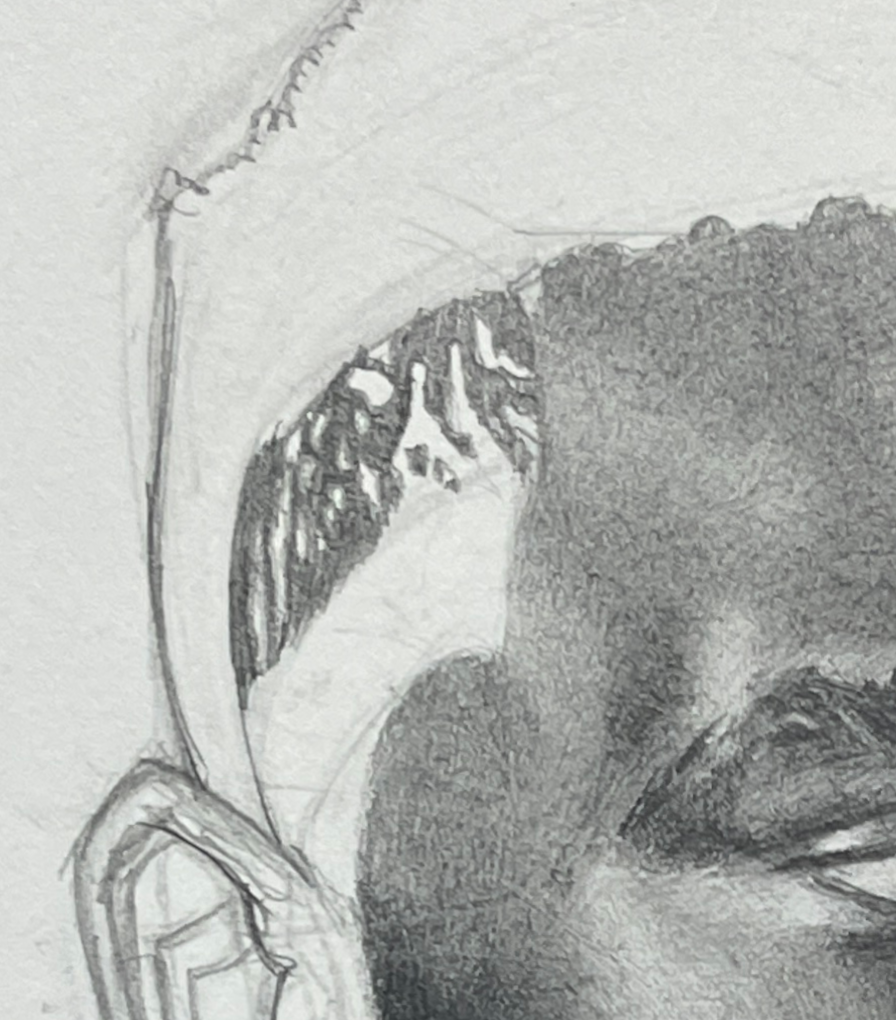
I start with the top most section where the fade blends into the fuller part of the hair on top of the head. Here, the shapes are bigger and darker. I draw the hair shapes first and fill them in. I fill in the sections of bare scalp with lighter value second.
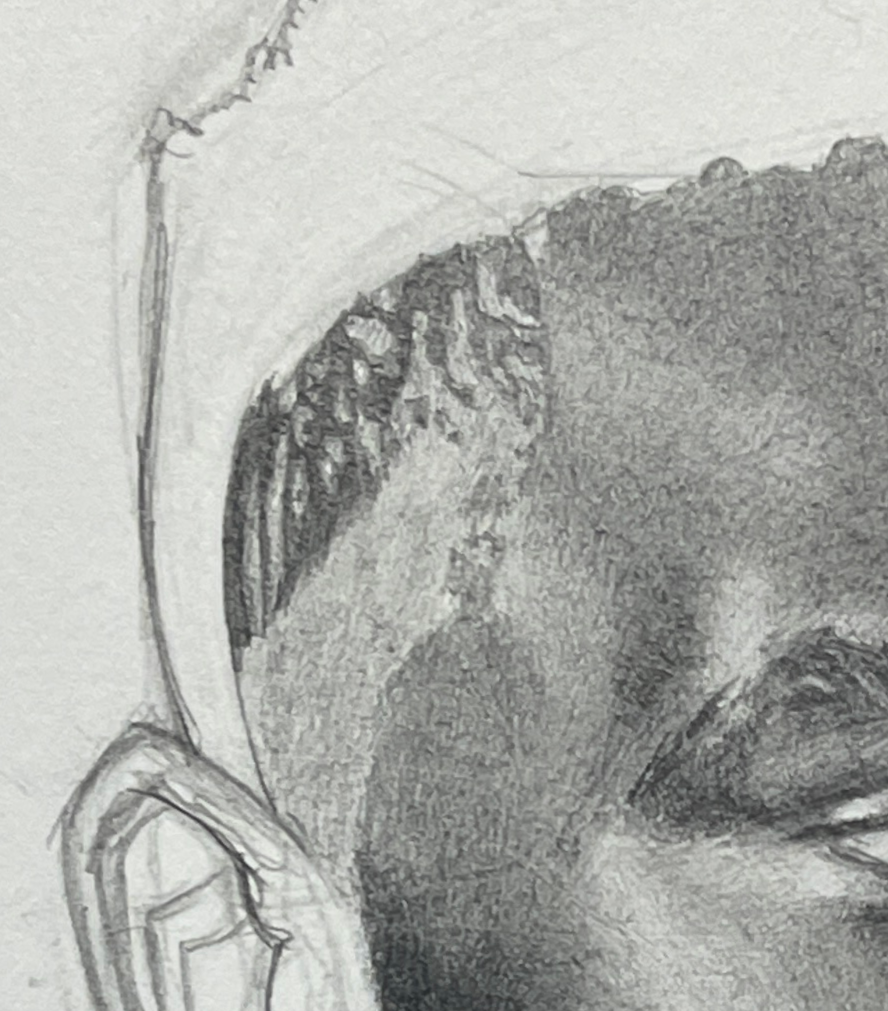
In the lower parts of the fade, the shapes of hair are smaller and the scalp shows through a lot more. I will approach this by undershading the scalp with a light value then drawing the hair pattern on top and shading it more darkly.

Not done with the fade yet, but I want to fill in the hair to give myself a better sense of progress as well as better demonstrate my approach to hair.
I fill the hair with a single flat value. Later, I will carve the light out of this flat shade and darken where I need to darken.
I would also like to note that at this stage while I was laying in the hair, I noticed that I had made the cheeks too narrow. It was easy to fix, pushing them out a bit more. I didn’t have to do any major redrawing.
Unfortunately, that wouldn’t be the case going forward…
Fixing a Major Mistake
I noticed that I had drawn the eye too far over to the viewer’s right, the model’s left. I figured this out first by noticing that something was off, then taking a plumb line measurement, checking the vertical alignment of the eye and the side of the nose.
Now, I need to move the eye over.
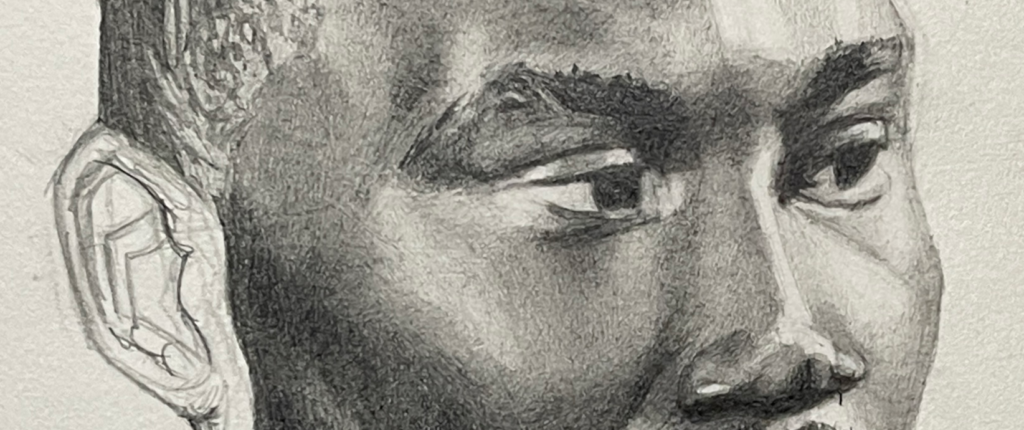
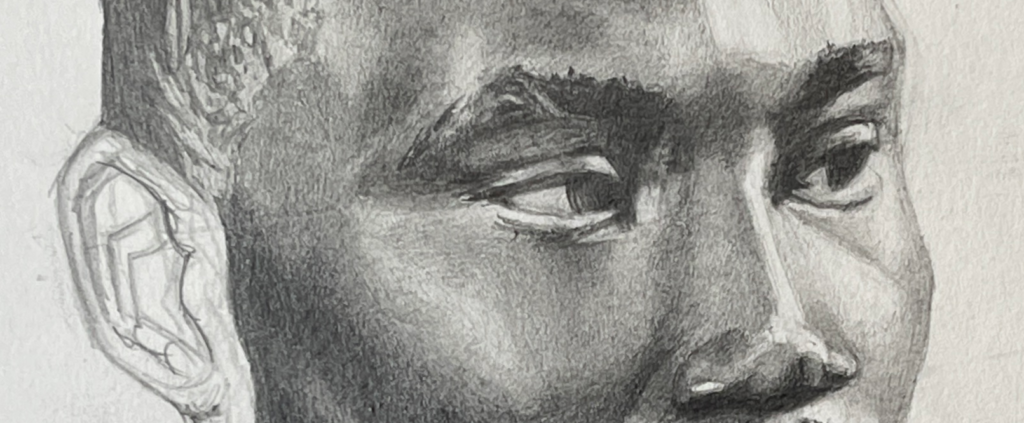
I actually inched the eye over a few times, but I’ll only show some of my corrections to keep from having to stuff this post with too many images. I think you can see my process here.
It’s unfortunate when a mistake happens this deep into rendering. You may have to erase through layers of graphite. Then, you redraw and have to shade all over again. But it happens.
I think it may be because I allow myself to be too lenient with myself in graphite, knowing it can be easily erased.
I do try to be more meticulous in other media like watercolor – watercolor which can be a bit more difficult to correct. I usually draw out my lay-in drawing at least once for practice to figure out which mistakes I might make and correct them there before laying in the drawing for the watercolor painting.
Back to the graphite drawing, once I’ve redrawn the eye over far enough, I try to shade it back in and reintegrate it with the surrounding area.
Continuing the Hair
I’m going to lay in the darks of the hair using a 4B.
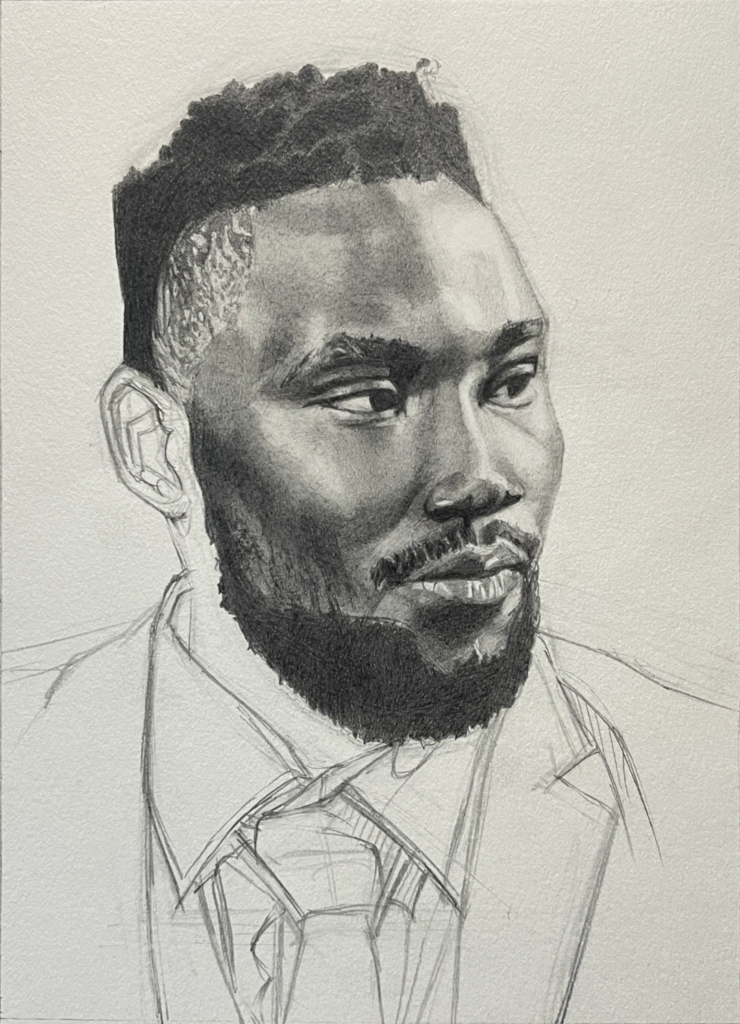
These shapes are yet again shapes I have to interpret. Once again, I block these shapes in over the flat shade I’ve laid in.
After this, I will lift out graphite, dabbing at the areas of light.
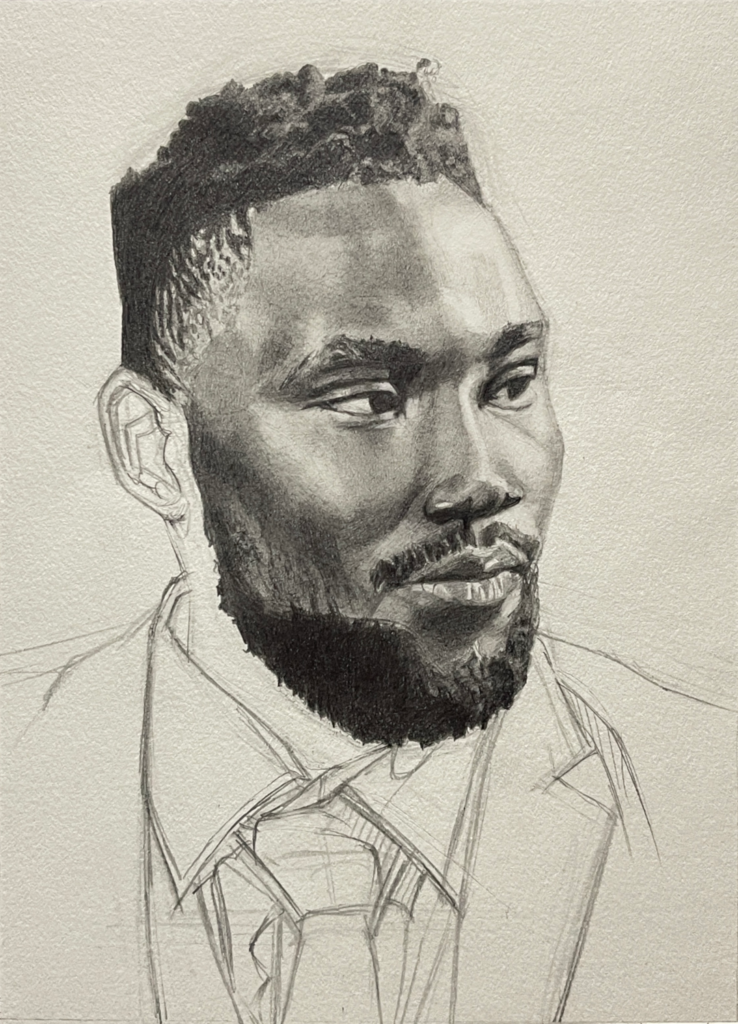
I don’t want to go too light, I just want to create good contrast with the darks of the hair.
After dabbing out, I go back in with pencil, blending the light areas back into the rest of the hair a bit. It’s hard to be precise with the kneaded, even when it’s molded into a thin shape, so I have to retread ground sometimes.
Finishing up the Fade
I did start the fade a little bit ago, and now it’s time to finish it up.
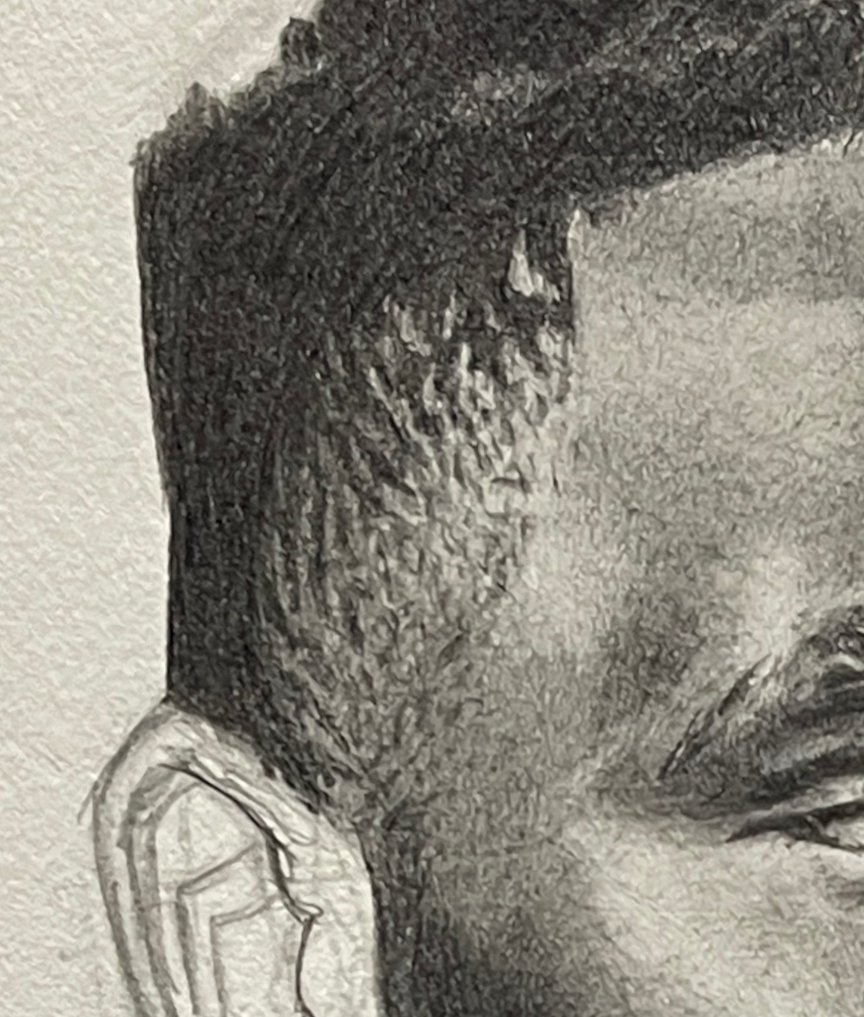
I strengthen the darks of the different shapes of the fade. I then darken the parts of the scalp showing through to match with the rest of the skin nearby.
To make the fade believable, I have to make its shapes darker and fairly larger and thicker near the top where it will blend into the hair on top of the head and then lighten the shapes as well as make them smaller as they blend out.
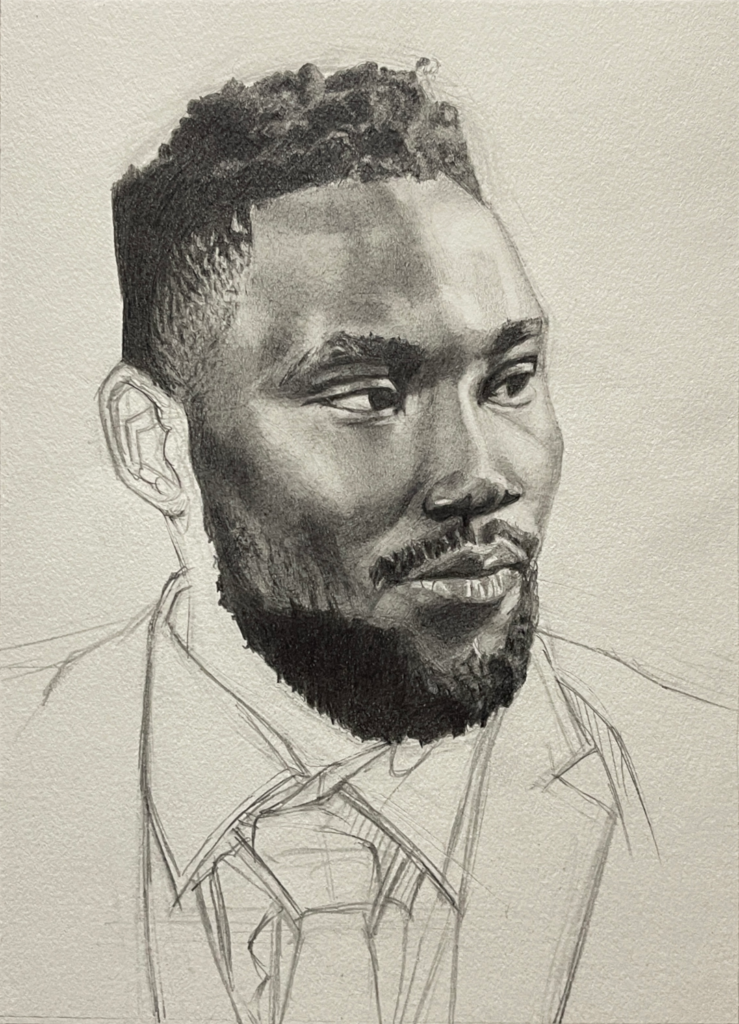
Almost done. There are bare parts of the skin left along with the clothes to render.
Other Posts in This Series
- Demonstration: Portrait in Graphite no. 2 (1) Line Drawing
- Demonstration: Portrait in Graphite no. 2 (2) Rendering Part 1
- Demonstration: Portrait in Graphite no. 2 (3) Rendering Part 2
- Demonstration: Portrait in Graphite no. 2 (4) Rendering Part 3
- Demonstration: Portrait in Graphite no. 2 (5) Rendering Part 4
- Demonstration: Portrait in Graphite no. 2 (7) Rendering Part 6
- Demonstration: Portrait in Graphite no. 2 (8) Finishing the Drawing