
Finishing the Drawing
Photo Reference

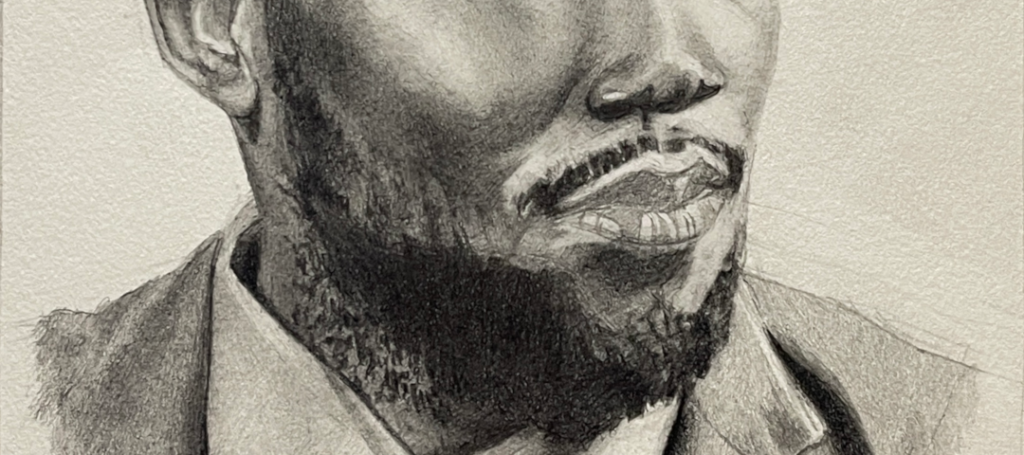
Where We Left off
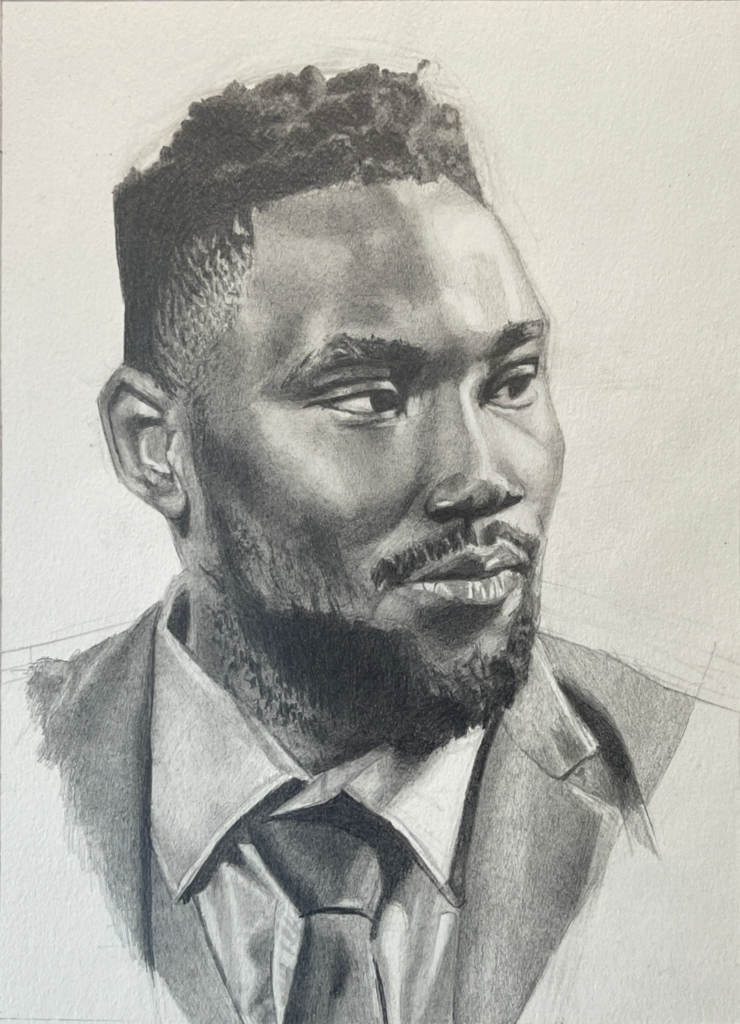
Last post, I finished covering the entire drawing. While I’m not yet finished, all of the blank areas of skin and the clothes have been shaded in and modeled to a fair degree.
Yet Another Mistake to Fix
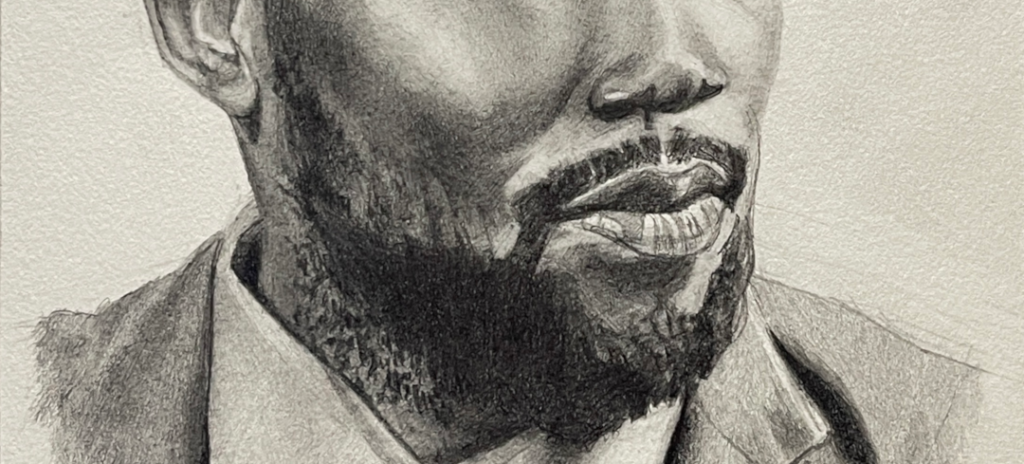
Unfortunately, I’ve noticed another major mistake in the structure drawing, something I should have taken care of early on but didn’t notice until late into rendering.
I needed to move the mouth down.
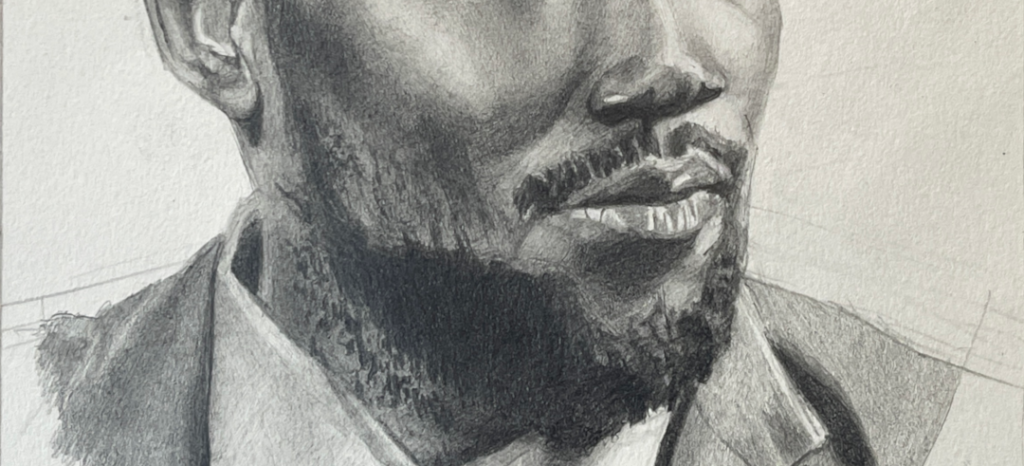
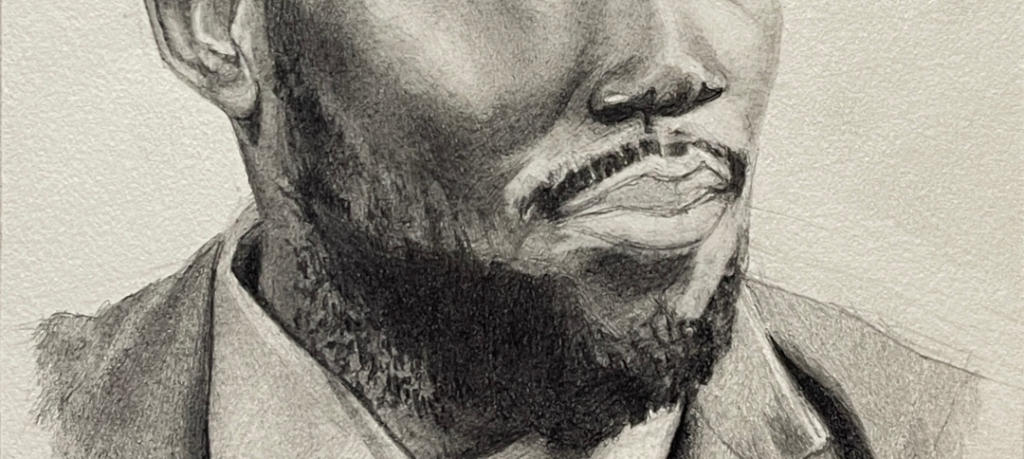
Now, I need to reshade everything, integrate my changes. Here, I’ll show the different stages of doing just that:
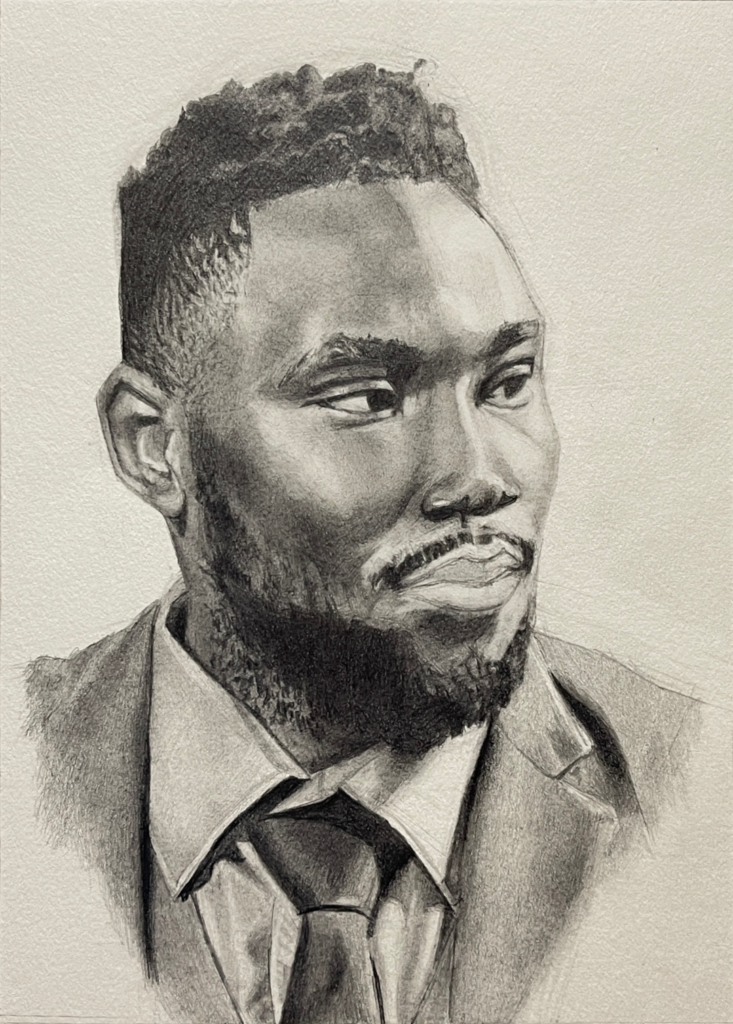
Final Touches
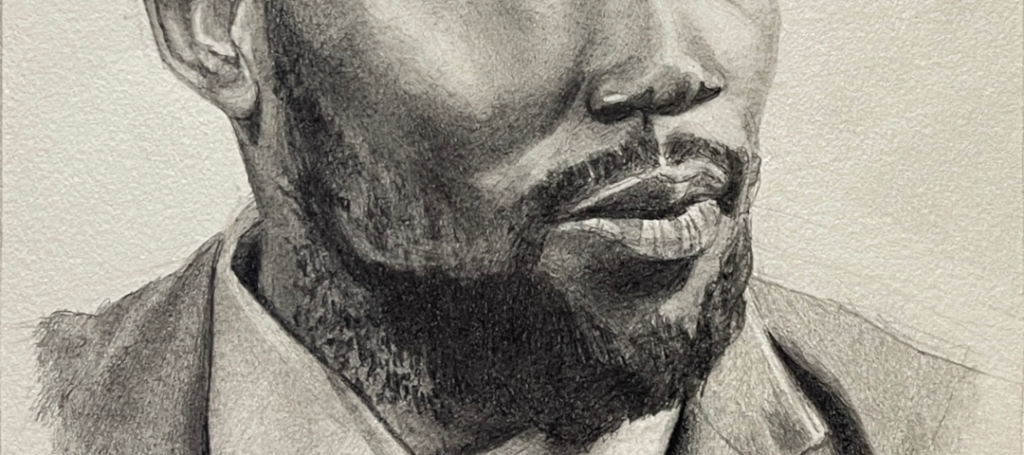
I had actually begun putting on the final touches, bringing the drawing to a close before the mistake. I had to pause and take care of it.
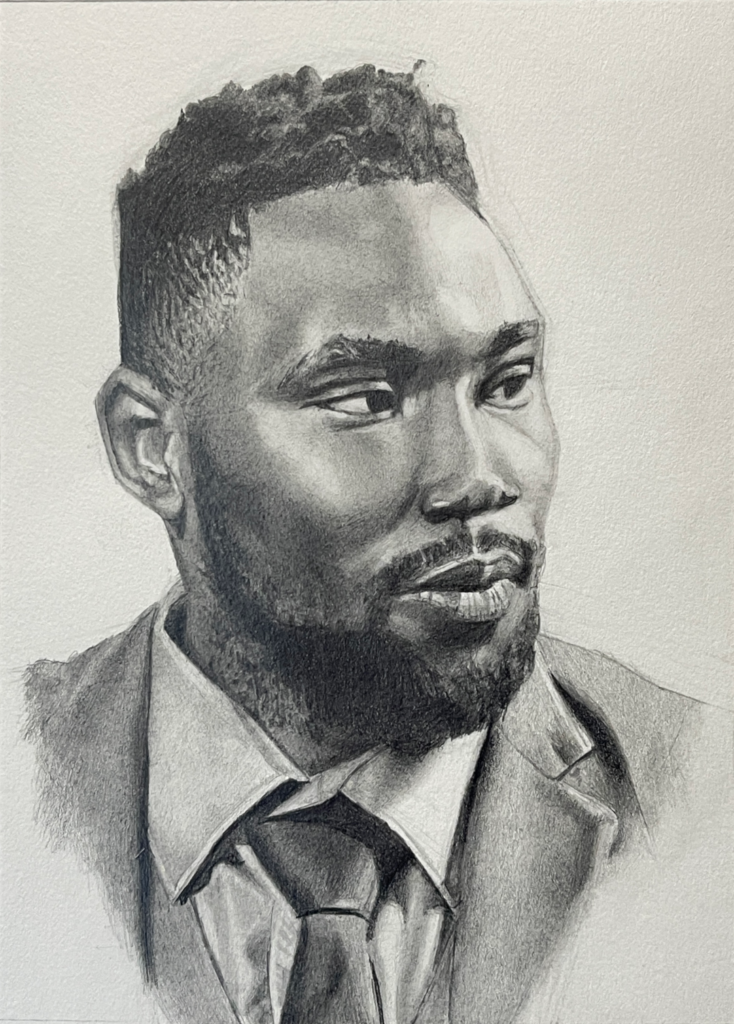
What I’ve done here is bring the values of the different regions of the face closer together.
That may have meant lifting graphite away with the kneaded eraser, darkening some values, and continuing to dab away at little dots of graphite until I had a smooth result.
This creates a sense of unity in the shading. I had actually started to create too much contrast by making the values in, for example, the forehead too different. Now, they’re closer together, not too dark, not too light creating a sense of harmony.
I also punched in the darks with the 2B and 4B leads for areas of occlusion in the clothes.
This process was a bit tedious. It took me time to assess, find a potential mistake or weak value I could correct or push harder, then I had to correct it. But that’s what I need to do to bring the drawing to a conclusion.
Post Processing
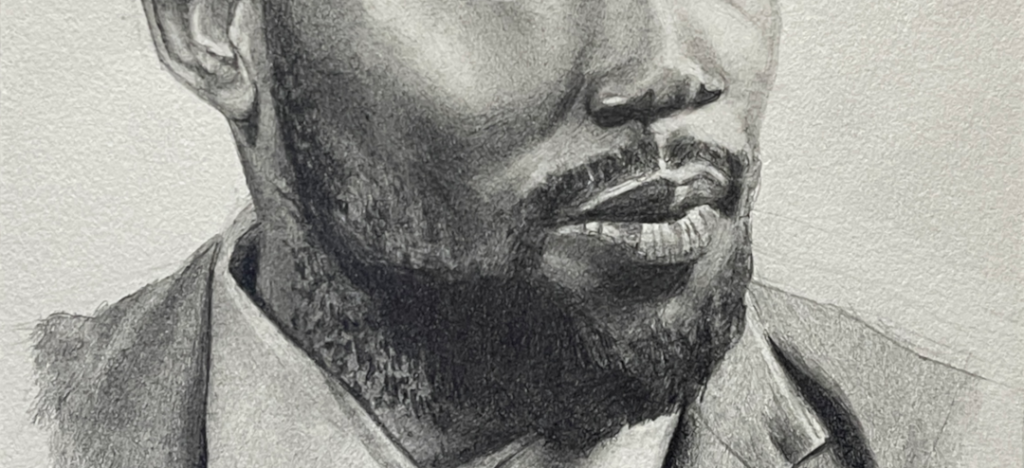
It would be a little tedious to make adjustments for each photo of each stage of the drawing, but looking at my drawing and the photo I took of it, the photo for whatever reason is a little washed out.
Here, I’ve tried to adjust the brightness of the image using curves in photo editing to represent what I see in real life as closely as possible.
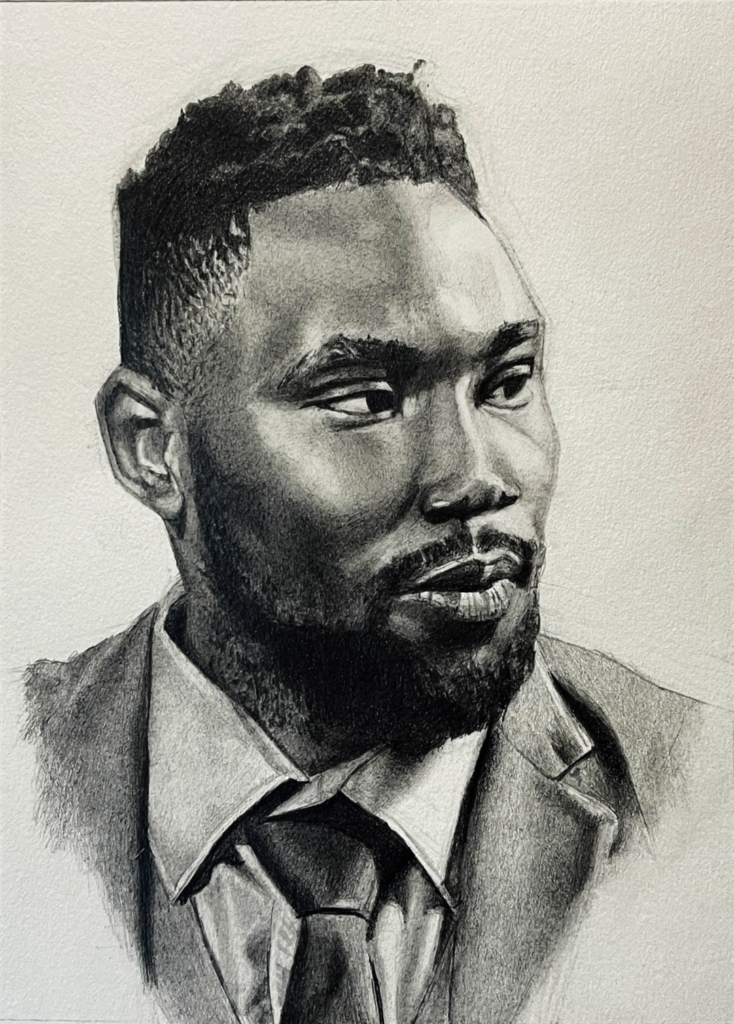
And with this, I call this drawing finished.
Other Posts in This Series
- Demonstration: Portrait in Graphite no. 2 (1) Line Drawing
- Demonstration: Portrait in Graphite no. 2 (2) Rendering Part 1
- Demonstration: Portrait in Graphite no. 2 (3) Rendering Part 2
- Demonstration: Portrait in Graphite no. 2 (4) Rendering Part 3
- Demonstration: Portrait in Graphite no. 2 (5) Rendering Part 4
- Demonstration: Portrait in Graphite no. 2 (6) Rendering Part 5
- Demonstration: Portrait in Graphite no. 2 (7) Rendering Part 6