
Rendering Part 3
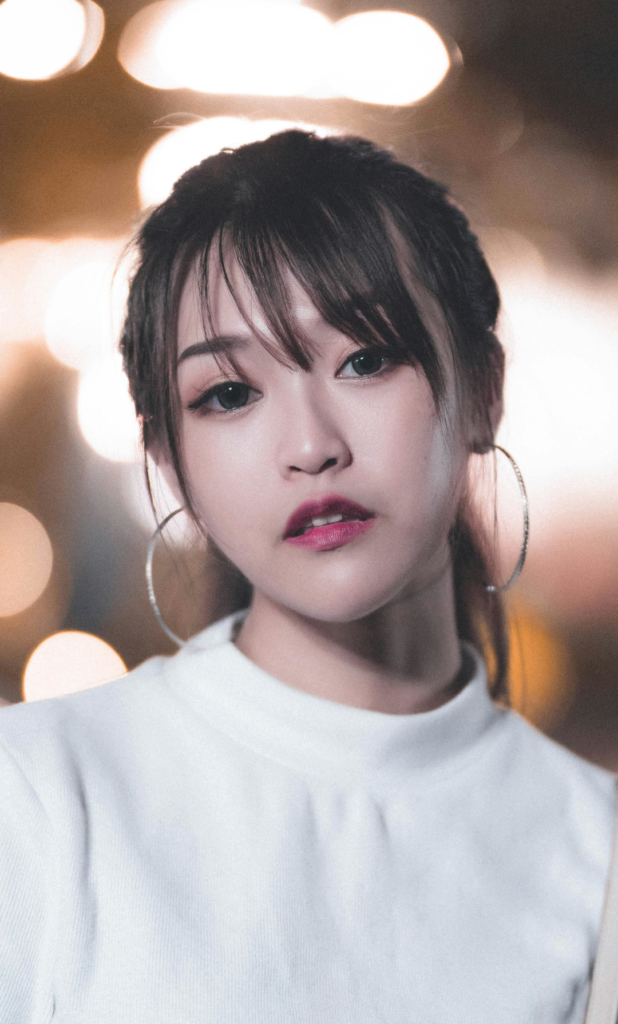
Reference Photo
Where We Left Off

I decided to restart the left cheek. I had actually gotten fairly far on the cheek’s shading, then I took an eraser to it and redrew the shadow shape.
Restarting the Shading for the Cheek


I’ve blocked everything in for the cheek to start.
Last time, I drew in the shape of the light shining into the shadow of the left cheek. I left that shape blank, shaded in everything around it, and gently darkened it, the goal being to make it look as much like the reference as possible.
I’m not doing that this time. This time, I’m blocking in the cheek solidly to start. I’m not leaving anything blank.


Now, I’m going to dab away the graphite to indicate a little bit of light in the shadow.

What I’ve done differently this time is make sure that I haven’t made the light in the shadow very light. Last time, I had made it so light so as to make it difficult to see the difference between light and shadow.


I actually see the left side of the model’s face as very light because of the fairly bright secondary light, but I think a little artistic license can help with both the shading and readability of the drawing.

In other words, I’ve decided I needed to change the values that I see for the sake of the drawing.
When you gain enough experience in drawing, this is something you can do easily. You need to be very familiar with form, how light works, and the range of your medium’s values. Then, you can light the subject in your drawing almost any way you want.
Rendering the Hair
I move on to the hair. First, I block in most of the hair with a flat, single value. These will be the darkest values I see more or less.

After I block in the darkest values of the hair, I block in the light then model everything out.

I find this the easiest way to render hair. Divide the areas of the hair into two major regions of value to start. Later, I can adjust values where I need. It’s just so much easier on the mind.
Otherwise, I’d be worrying about this value here, that value there, sometimes getting confused, needing to redo some things, and it would all be a back and forth that’s not necessary.
The Lips and Mouth
[image gallery]


Like with everything else, I do the lips in two stages. A general blocking in and then I model out the different values.
The teeth are put in with suggestion. I don’t draw every individual tooth. I do try to get in the shadow and light accurately.
Where We’re At

The face and hair are mostly rendered. The drawing’s looking more complete by now.
Next, I’m shading in the neck and clothing.